Body Contouring: Preparing, Techniques, and Recovery Process

Preparing for Body Contouring Steps

Personal Goals

Discuss personal goals with a plastic surgeon. This helps ensure the procedure aligns with your expectations. Share your medical history to determine suitability. The surgeon will assess if body contouring is safe for you by examining the skin surface, appearance, and target areas as your health care provider.

Physical Examination

Undergo a physical examination. The doctor will check your overall health. They will also examine the target areas. Marking these areas ensures precision in contouring. This step is crucial for achieving the desired appearance.

Blood Tests

Complete necessary blood tests before the procedure. These tests help identify any underlying health issues. The results guide the surgeon in planning the treatment. It’s important to follow all pre-procedure requirements.

Lifestyle Adjustments

Make lifestyle adjustments as advised by your doctor. Quit smoking if you do, as it can affect healing, according to your health care provider and patient community. Maintain a healthy diet and exercise regularly. These steps can improve the outcome of body contouring.

Medication Management

Manage your medications carefully. Inform your doctor about all medicines you take. Some drugs may need to be stopped or adjusted. This reduces risks during and after the procedure.

Office Visit

Schedule an office visit to finalize plans. Discuss the details of the procedure, including target areas and invasive body techniques if applicable, with the health care provider. Understand what will happen on the day of surgery. Clear communication ensures smooth preparation.
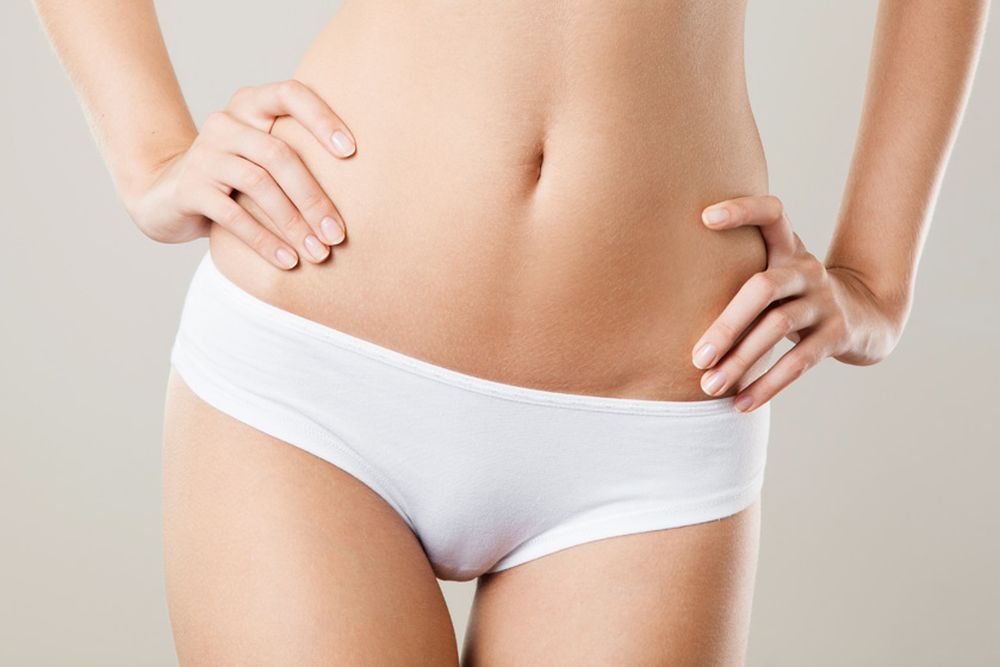
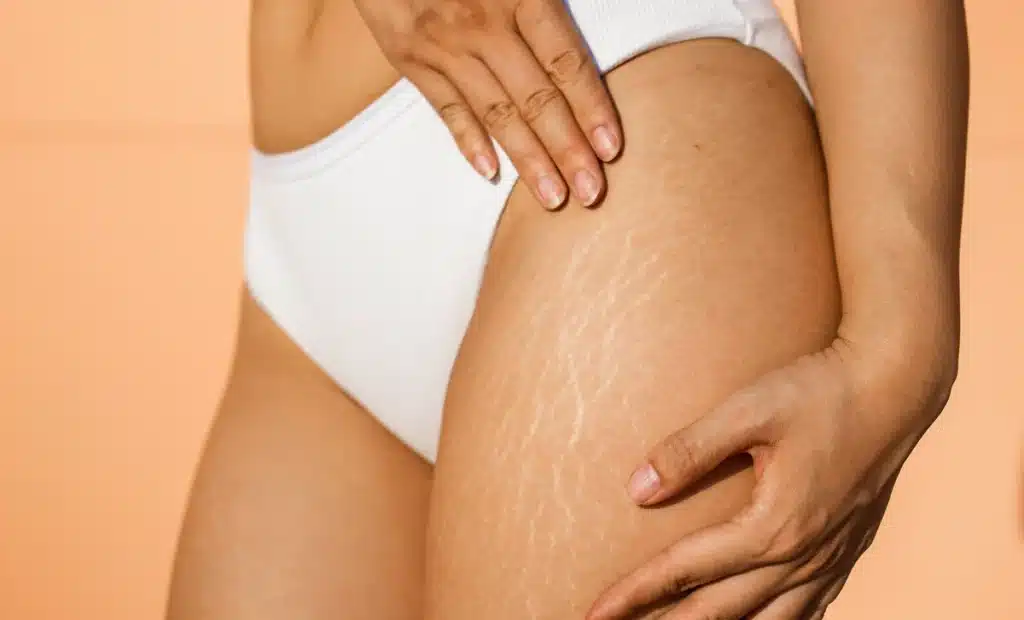
Target Areas

Identify specific target areas for contouring. Common areas include abdomen, thighs, and arms. Marking these places helps focus the treatment. Precise marking leads to better results and symmetry.

Procedure Details

Learn about the different methods used in body contouring:

  • Liposuction removes fat cells from specific areas.
  • Laser treatments use heating to reduce fat.
  • Ultrasound techniques break down fat cells with sound waves.
  • Cryolipolysis freezes fat at low temperatures.

Each method has its own benefits and risks.

Recovery Plan

Prepare a recovery plan with your surgeon’s guidance. Understand post-procedure care instructions. Arrange for someone, such as a health care provider or a member of the patient community, to help you during recovery if needed. Proper planning aids in a smoother healing process.

Understanding Surgical Techniques

Incision Methods

Surgeons use different incision methods in body contouring. The choice depends on the area being treated. For example, a tummy tuck often requires a horizontal incision near the pubic area, as discussed with your health care provider. Arm lifts use incisions along the inner arm. Thigh lifts involve cuts in the groin area. Each method aims to minimize visible scars.

The length and placement of incisions vary. Surgeons consider skin elasticity and fat distribution. They also factor in patient preferences. Precise planning ensures effective outcomes with minimal scarring.

Tissue Repositioning

Tissue repositioning is crucial in body contouring. Surgeons remove excess fat and skin. They then tighten the remaining tissues. This process reshapes the body for a more toned appearance, often involving heating and guidance from a health care provider.

Liposuction is commonly used. It removes fat deposits through small tubes called cannulas. Other techniques include lifting and tightening muscles. These steps improve body contours significantly.

Role of Anesthesia

Anesthesia plays a vital role in body contouring surgeries. It ensures patient comfort and safety throughout the procedure. General anesthesia is often used for extensive surgeries like tummy tucks or full-body lifts.

Local anesthesia may be used for smaller areas. It numbs only the specific part being treated. Proper anesthesia management reduces pain and anxiety during surgery.

Post-Operative Procedures

Post-operative care is essential for recovery. Surgeons close incisions with sutures, staples, or adhesive tapes. They then apply bandages to protect the invasive body wound and reduce swelling.

Patients must follow specific instructions after surgery:

  • Keep the surgical area clean and dry.
  • Avoid strenuous activities.
  • Wear compression garments as advised.

Regular follow-ups with the surgeon are important. These visits ensure proper healing and address any concerns.

Exploring Liposuction Process

Fat Suctioning

Liposuction reshapes the body by removing fat. Surgeons use a thin tube called a cannula. The cannula connects to a vacuum device. They insert it through small incisions in the skin. The vacuum then sucks out excess fat.

Pre-Operative Marking

Surgeons mark the body before the procedure. These marks guide where to remove fat. Accurate marking ensures balanced results. It helps in achieving symmetrical contours.

Fluid Injection

Before suctioning, surgeons inject fluid into the area. This fluid contains saline, anesthetic, and epinephrine. Saline helps to loosen fat cells. Anesthetic numbs the area. Epinephrine reduces bleeding and bruising.

Procedure Duration

The duration of liposuction varies. It depends on how much fat needs removal. Smaller areas may take one hour. Larger areas can take several hours. Surgeons plan the procedure time based on patient needs.

Recovery Process

After liposuction, patients wear compression garments. These garments reduce swelling and support new contours. Recovery time can vary from days to weeks. Full results may take months to appear.

Non-Surgical Lipolysis Methods

Laser Treatment

Laser treatment uses laser energy to target fat cells. The invasive body laser heats the fat, causing the cells to break down. This invasive body method is effective for small areas of stubborn pockets of fat. The skin is marked before treatment to ensure precision. The laser device is then applied to the marked areas on the invasive body.

Ultrasound Treatment

Ultrasound treatment uses sound waves to destroy excess fat cells in invasive body areas. It targets specific areas without damaging surrounding tissues. The procedure begins with marking the skin. A gel is applied to help transmit the ultrasound waves in invasive body procedures. The device is then moved over the area in a circular motion.

Cryolipolysis

Cryolipolysis, or “fat freezing,” uses cold temperatures to kill fat cells. This method is ideal for reducing fat in localized areas. The treatment starts by marking the skin and applying a protective gel pad. A vacuum applicator suctions the targeted area and cools it down.

Radiofrequency

Radiofrequency treatments use heat to reduce fat. This method also tightens the skin, making it a dual-purpose treatment. The skin is marked first, and a conductive gel is applied. The radiofrequency device delivers controlled heat to the fat cells, causing them to die.
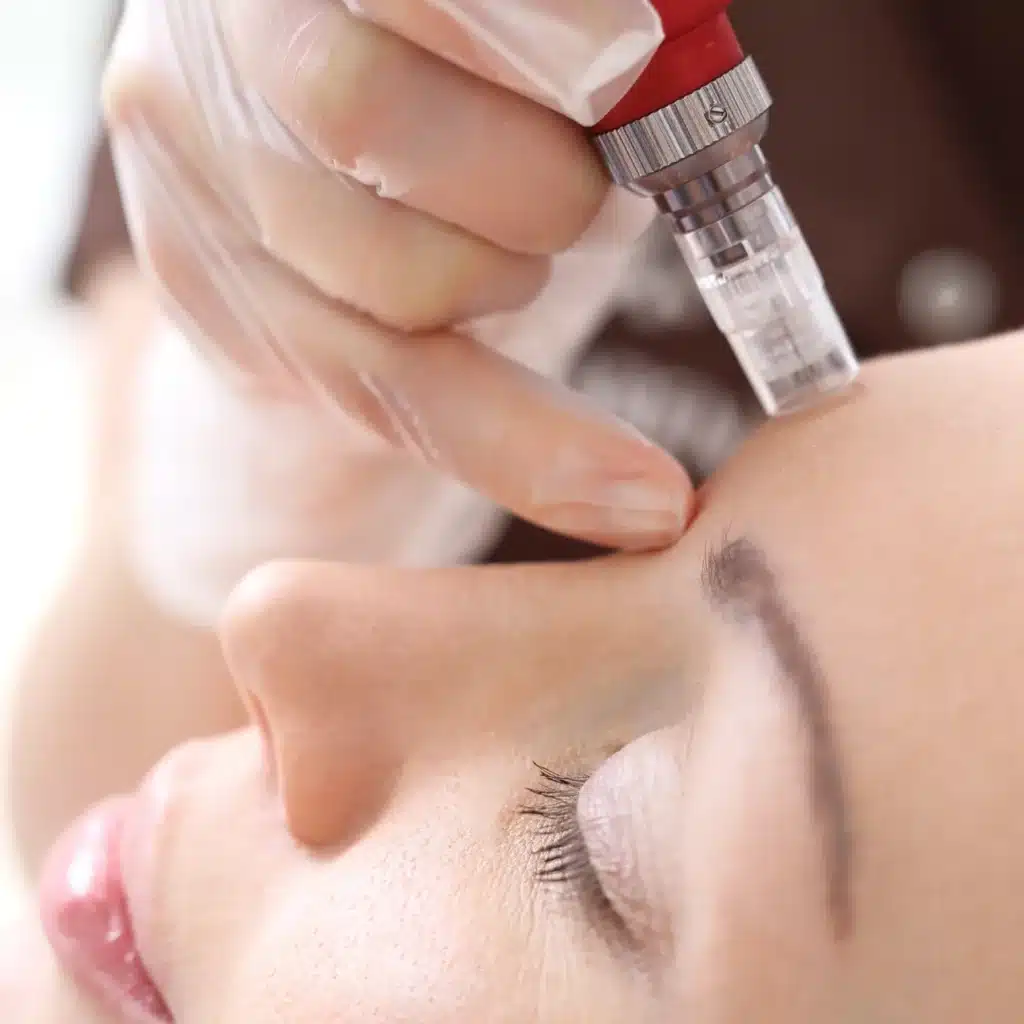
Vibration Therapy

Vibration therapy uses mechanical vibrations to break down fat cells. This method can be combined with other treatments for better results. The skin is marked, and a vibrating device is used on the target area. The vibrations disrupt the fat cells, making them easier for the body to remove.

Multiple Sessions Needed

Non-surgical lipolysis methods often require multiple sessions for visible results. Each session targets a specific amount of fat. Patients usually need between 3-5 sessions, spaced weeks apart.

Post-Treatment Care Guidelines

Drain Care

Patients often have drains placed to remove excess fluids. Drains should be emptied regularly. Follow your health care provider’s instructions on how often to do this. Record the amount of fluid each time. Clean the area around the drain with antiseptic wipes to prevent infection.

Bandage Changes

Bandages must be changed frequently to keep the surgical site clean. Use sterile gauze and adhesive tape. Ensure hands are washed thoroughly before touching any bandages. Your health care provider will offer specific guidelines on how often to change them.

Activity Restrictions

Avoid strenuous activities during the initial recovery period. Light walking is encouraged to improve circulation. Avoid lifting heavy objects for at least four weeks. Follow all activity restrictions provided by your surgeon.

Support System

Having a support system is crucial post-surgery. Arrange for someone to drive you home after the procedure. You may need help with daily tasks like cooking and cleaning for a few days. Emotional support from family or friends can also aid in recovery.

Medication Regimen

Pain management is essential following body contouring procedures. Take prescribed pain medication as directed by your health care provider. Antibiotics may also be prescribed to prevent infection. Always complete the full course of antibiotics.

Monitoring Effects

Monitor the treated areas for any signs of complications. Look out for excessive swelling, redness, or unusual discharge from the surgical site. Contact your health care provider immediately if you notice any concerning symptoms.

Risks and Precautions

Be aware of potential risks associated with body contouring treatments. These include infection, scarring, and changes in skin sensation. Following all post-treatment care guidelines can minimize these risks.

Patient Community

Joining a patient community can provide additional support and information. Many people find comfort in sharing their experiences and learning from others who have undergone similar treatments.

Home Environment

Prepare your home for a smooth recovery process. Set up a comfortable resting area with easy access to essentials like water, snacks, and medications. Keep important phone numbers handy in case of emergencies.

Recovery Journey After Body Contouring

Timeline and Milestones

The recovery journey after body contouring varies for each person. Most patients see initial results within a few weeks. Swelling and bruising are common in the first two weeks. By the third week, these symptoms typically start to subside.

After one month, many patients return to light activities. Full recovery can take up to six months. During this time, the body continues to heal and adjust. Patients should follow their surgeon’s advice closely.

Signs of Complications

Recognizing complications early is crucial. Common signs include:

  • Severe pain not relieved by medication
  • Excessive swelling or bruising
  • Unusual discharge from incision sites
  • Fever over 100.4°F

If you notice any of these signs, contact your healthcare provider immediately. Early intervention can prevent more serious issues.

Lifestyle Changes

Maintaining results requires lifestyle changes. Eating a balanced diet helps sustain the new body shape. Regular exercise keeps muscles toned and skin firm.

Avoid smoking and excessive alcohol consumption. These habits can slow down healing and affect results negatively. Staying hydrated also supports recovery and overall health.

Follow-Up Care

Follow-up appointments are essential. They allow your surgeon to monitor progress and address any concerns. Typically, the first follow-up is scheduled within a week after surgery. Subsequent visits may occur at one month, three months, and six months post-surgery.

These appointments ensure that healing is on track. Surgeons can provide additional care tips during these visits.

Closing Thoughts

Body contouring is a transformative journey. You’ve learned about the steps, techniques, and recovery involved. Now it’s time to take action. Whether you’re considering surgical or non-surgical options, the key is preparation and care. Trust your instincts and consult with experts to achieve the best results.

Ready to redefine your body? Dive deeper into your research, ask questions, and choose the right path for you. Your dream body is within reach. Don’t wait—start your journey today.

Frequently Asked Questions

How should I prepare for body contouring?

Consult your surgeon. Follow pre-surgery instructions, which may include fasting. Avoid smoking and certain medications.

What are the common surgical techniques for body contouring?

Liposuction, tummy tucks, and body lifts are common. Each targets specific areas for fat removal or skin tightening.

What is the liposuction process like?

Liposuction involves small incisions and a suction device to remove fat. It’s usually done under anesthesia.

Are there non-surgical methods for body contouring?

Yes, options include CoolSculpting and SculpSure. These use cold or heat to destroy fat cells without surgery.

What post-treatment care is needed after body contouring?

Follow your surgeon’s advice. This often includes rest, hydration, and avoiding strenuous activities.

How long is the recovery journey after body contouring?

Recovery varies by procedure but typically lasts several weeks. Full results may take months to appear.

Is body contouring safe?

When performed by a qualified surgeon, body contouring is generally safe. Always discuss risks during your consultation.

Spider Veins vs Varicose Veins: Causes, Symptoms & Treatments

Understanding Varicose and Spider Veins

Varicose Veins

Varicose veins are large, swollen veins. They often appear on the legs and feet. These veins twist and bulge out from the skin. Caused by weakened valves, varicose veins allow blood to flow backward and pool, leading to increased pressure and health problems.

People with varicose veins may experience pain or discomfort. The condition can also lead to more serious health problems, including increased pressure and varicose vein issues. For instance, health problems like ulcers or blood clots might develop over time.

Spider Veins

Spider veins are smaller, red or blue veins. They appear close to the surface of the skin. Unlike varicose veins, they do not bulge out. Spider veins often look like a spider’s web.

These veins usually appear on the legs or face. They are less likely to cause pain but can be a cosmetic concern for many women.

Causes

Both conditions share common causes. Genetics play a big role. If your parents had these vein issues, you might too, according to the nurse on the website. Aging is another factor; as you age, veins lose elasticity, nurse.

Other causes include:

  • Pregnancy
  • Obesity
  • Prolonged standing or sitting
  • Hormonal changes

Symptoms

Varicose veins have more noticeable symptoms than spider veins. You might feel aching or heaviness in your legs. Swelling, throbbing, or burning sensations are common.

Symptoms of spider veins are mostly visual. They rarely cause physical pain but can affect self-esteem, according to the nurse.

Diagnosis

Doctors diagnose these conditions through physical exams. They may also use ultrasound to check blood flow in the veins, nurse. This helps determine the severity of the condition.

Treatment Options

Several treatments exist for both conditions:

  1. Compression stockings help improve blood flow.
  2. Sclerotherapy involves injecting a solution into the vein.
  3. Laser treatments use light to reduce vein appearance.
  4. Surgery is an option for severe cases of varicose veins.

Prevention Tips

Preventing these vein issues is possible with lifestyle changes:

  • Exercise regularly
  • Maintain a healthy weight
  • Elevate your legs when resting
  • Avoid long periods of standing or sitting

Causes Behind Vein Issues

Genetics

Genetics play a significant role in vein issues. If family members have varicose or spider veins, you are at higher risk. Studies show that heredity accounts for about 80% of varicose vein cases. This means if your parents or grandparents had these conditions, you might develop them too.

Age

Age is another factor. As people get older, veins lose elasticity. This can cause blood to pool, leading to varicose veins. Most people over the age of 50 experience some form of vein issue. Women are more likely than men to develop these problems due to hormonal changes.

Hormonal Changes

Hormonal changes impact vein health. Pregnancy, menopause, and birth control pills can affect veins. During pregnancy, the amount of blood in the body increases. This puts extra pressure on veins, especially in the legs. Birth control pills and menopause also change hormone levels, contributing to vein issues.

Obesity

Obesity increases the risk of developing varicose and spider veins. Extra weight puts additional pressure on leg veins. The veins must work harder to push blood back to the heart. This can weaken vein walls and valves, leading to vein problems.

Sedentary Lifestyle

A sedentary lifestyle contributes to vein issues. Sitting or standing for long periods makes it difficult for blood to circulate properly. Lack of movement can cause blood to pool in the legs, leading to varicose and spider veins. Regular exercise helps improve circulation and reduces the risk.

Injury or Trauma

Injury or trauma to the legs can damage veins. Damaged veins may not function properly, causing blood to pool. This can lead to varicose or spider veins. People who have had leg injuries should monitor their vein health closely.

Prolonged Standing

Jobs that require prolonged standing increase the risk of vein problems. Nurses, teachers, and retail workers often suffer from varicose veins due to long hours on their feet. Standing for extended periods causes blood to pool in leg veins, straining them over time.

Blood Clots

Blood clots can lead to vein issues as well. A clot in a deep vein can cause increased pressure in surface veins. This pressure damages valves and leads to varicose or spider veins. People with a history of blood clots should be aware of this risk.

Sun Exposure

Sun exposure affects spider veins more than varicose veins. Ultraviolet rays can damage skin and small blood vessels just beneath it. This damage makes spider veins more noticeable, especially on the face.

Spotting the Symptoms

Spider Veins

Spider veins are small, thin blood vessels. They appear close to the skin’s surface. These veins often look like red, blue, or purple webs. They usually form on the legs and face.

People with spider veins might feel a slight burning or itching in the affected area. However, these symptoms are generally mild. Spider veins rarely cause serious pain.

Varicose Veins

Varicose veins are larger, swollen veins. They are often raised above the skin’s surface. These veins usually appear blue or dark purple.

People with varicose veins might experience aching or throbbing pain. The affected area can also feel heavy or tired. In severe cases, varicose veins can lead to swelling and ulcers.

Visual Differences

The visual differences between spider veins and varicose veins are clear. Spider veins are thin and web-like. Varicose veins are thick and bulging.

Spider veins resemble a spider’s web or tree branches. They are usually flat against the skin. Varicose veins twist and bulge out from the skin’s surface.

Common Locations

Both types of veins commonly appear on the legs. However, spider veins can also form on the face.

Varicose veins mainly affect the legs and feet. This is due to standing and walking, which increase pressure in these areas.

Emotional Impact

Vein issues can affect self-esteem. People might feel embarrassed by visible veins.

For example, someone with spider veins on their face might avoid social events. Those with varicose veins may feel uncomfortable wearing shorts or skirts.

Medical Concerns

While spider veins are mostly a cosmetic issue, varicose veins can lead to more serious problems. Complications include:

  • Blood clots
  • Skin ulcers
  • Chronic pain

Preventing Vein Problems

Exercise Regularly

Exercise helps improve blood circulation. Walking, swimming, and cycling are great options. Aim for at least 30 minutes a day. This keeps veins healthy and reduces pressure.

Maintain Healthy Weight

Extra weight puts pressure on veins. Maintaining a healthy weight can prevent vein problems. Eat balanced meals with fruits, vegetables, and lean proteins. Avoid processed foods and sugary drinks.

Elevate Legs

Elevating your legs helps blood flow back to the heart. Do this several times a day for 15 minutes each time. Use pillows to keep legs above heart level.

Wear Compression Stockings

Compression stockings apply gentle pressure to legs. This helps veins move blood more efficiently. They are available over-the-counter or by prescription. Consult a doctor for the right fit.

Avoid Prolonged Sitting or Standing

Sitting or standing for long periods can worsen vein issues. Take breaks every hour to move around. Flex your feet and stretch your legs if you must sit or stand for long periods.

Stay Hydrated

Drinking enough water keeps blood thin and flowing smoothly. Aim for 8 glasses of water daily. Proper hydration supports overall vein health.

Avoid Tight Clothing

Tight clothing can restrict blood flow in the legs. Opt for loose-fitting clothes, especially around the waist, groin, and legs. This allows proper circulation.

Limit Salt Intake

Excess salt can cause water retention, increasing vein pressure. Reduce salt in your diet by avoiding salty snacks and processed foods. Use herbs and spices for flavor instead.

Quit Smoking

Smoking damages blood vessels and affects circulation. Quitting smoking improves overall health and reduces the risk of vein problems. Seek support from friends, family, or cessation programs.

Monitor Hormone Levels

Hormones can affect vein health, especially in women. Birth control pills and hormone replacement therapy may increase risk. Discuss with a doctor about safer alternatives if concerned.

Exploring Treatment Options

Sclerotherapy

Sclerotherapy is a common treatment for spider veins. It involves injecting a solution into the veins. This solution causes the veins to scar and collapse. Blood then reroutes through healthier veins. The collapsed vein fades within a few weeks.

This method is effective and minimally invasive. Patients can return to normal activities quickly. Side effects may include swelling or bruising.

Laser Therapy

Laser therapy uses light energy to treat veins. The laser heats up and damages the vein walls. This causes the veins to close off. Over time, the treated veins fade away.

Laser therapy works well for smaller spider veins. It is non-invasive and does not require needles. Multiple sessions may be needed for best results.

Endovenous Ablation

Endovenous ablation treats larger varicose veins. A doctor inserts a thin tube into the vein. Heat from radiofrequency or laser energy seals the vein shut. Blood flow then shifts to nearby healthy veins.

This procedure is less painful than vein stripping. Recovery time is shorter, usually within a week. Possible side effects include skin burns or nerve damage.

Vein Stripping

Vein stripping removes large varicose veins surgically. The doctor makes small incisions in the skin. The problematic vein is then pulled out through these cuts.

This method is often used when other treatments fail. Recovery can take two to four weeks. Risks include infection and deep vein thrombosis.

Compression Stockings

Compression stockings are a non-surgical option. They apply pressure to the legs, helping blood flow back to the heart. This reduces swelling and discomfort from varicose veins.

Stockings come in various strengths and lengths. They are worn during the day and removed at night. They do not eliminate veins but help manage symptoms.

Lifestyle Changes

Lifestyle changes can support other treatments. Regular exercise improves circulation. Elevating legs reduces pressure on veins.

Maintaining a healthy weight prevents added strain on leg veins. Avoiding long periods of standing or sitting helps too.

Sclerotherapy Explained

Procedure Overview

Sclerotherapy is a common treatment for spider and varicose veins. A doctor injects a solution directly into the vein. This solution causes the vein to scar and collapse. The blood then reroutes through healthier veins.

Effectiveness

Sclerotherapy is highly effective. Studies show that it can eliminate 50% to 80% of treated veins. Spider veins often disappear within three to six weeks. Larger varicose veins may take three to four months.

Preparation

Before the procedure, avoid certain medications. Blood thinners like aspirin should be stopped. Inform your doctor about all medications you are taking. Wear loose, comfortable clothing on the day of the procedure.

Side Effects

There are some side effects. You might experience mild itching or swelling at the injection site. Bruising is also common but usually fades within a few days. In rare cases, small ulcers may form.

Post-Procedure Care

After sclerotherapy, walking is encouraged. Avoid strenuous exercise for a few days. Compression stockings may be recommended to help with healing. Keep the treated area out of direct sunlight.

Success Rate

The success rate of sclerotherapy is high. Most patients see significant improvement. However, multiple treatments may be necessary for optimal results. Follow-up visits with your doctor are important.

Surgery Insights

Spider Veins

Spider veins are small, thin veins visible on the skin. They often appear red or blue and look like spider webs. Treatments for spider veins include laser therapy and surgery.

Laser therapy uses light to target the veins. The heat from the laser causes the veins to collapse and fade. This treatment is quick and effective. It usually requires multiple sessions for the best results.

Surgery for spider veins is less common. It involves removing or tying off the affected veins. This method is more invasive but can be necessary for severe cases.

Varicose Veins

Varicose veins are larger, swollen veins that often appear twisted or bulging. They are usually found in the legs and can cause pain or discomfort. Several surgical options are available for varicose veins.

Vein stripping is a traditional method. Surgeons remove long sections of the vein through small incisions. This procedure has been used for many years and is very effective.

Endovenous laser treatment (EVLT) is a newer option. A laser fiber is inserted into the vein through a small incision. The laser heats the vein, causing it to collapse and seal shut. This method is less invasive than vein stripping.

Radiofrequency ablation (RFA) uses radio waves instead of lasers. A catheter is inserted into the vein, and radiofrequency energy heats the vein walls. The heat causes the vein to collapse and close off.

Recovery Time

Recovery time varies depending on the procedure. Laser treatments for spider veins have minimal downtime. Patients can usually return to normal activities immediately.

Vein stripping requires more recovery time. Patients may need several weeks to heal fully. Bruising and swelling are common after this surgery.

EVLT and RFA have shorter recovery times compared to vein stripping. Most patients can resume daily activities within a few days.

Risks and Complications

All surgeries come with risks. Common complications include bruising, swelling, and infection at the incision site.

More serious risks involve blood clots or nerve damage. These complications are rare but possible.

Patients should discuss all potential risks with their doctor before undergoing any procedure.

Choosing the Right Treatment

The choice between treatments depends on several factors:

  • Severity of the veins
  • Patient’s overall health
  • Desired recovery time
  • Doctor’s recommendation

Self-Care Post Treatment

Rest and Elevation

After treating spider veins or varicose veins, rest is crucial. Elevate your legs to reduce swelling. Lie down and prop your legs up with pillows. This improves blood flow.

Compression Garments

Doctors often recommend compression stockings. These garments help veins heal properly. Wear them daily for several weeks. They prevent blood from pooling in the legs.

Physical Activity

Light exercise aids recovery. Walking boosts circulation and prevents blood clots. Avoid strenuous activities initially. Gradually increase exercise intensity over time.

Hydration and Diet

Stay hydrated to maintain healthy blood flow. Drink plenty of water throughout the day. Eat foods rich in fiber, such as fruits and vegetables. Fiber helps prevent constipation, which can strain veins.

Pain Management

You may experience discomfort post-treatment. Over-the-counter pain relievers like ibuprofen can help. Apply ice packs to reduce swelling and numb the area.

Avoid Prolonged Standing or Sitting

Long periods of standing or sitting can worsen symptoms. Take breaks to move around if you must stand or sit for long durations. Flexing your feet and ankles can also improve circulation.

Follow-Up Appointments

Attend all scheduled follow-up appointments. Your doctor will monitor progress and address any complications. Report any unusual symptoms immediately.

Seeking Professional Help

Identifying Symptoms

Recognizing symptoms early is crucial. Spider veins are small and red or blue. They often look like a web. Varicose veins are larger and bulging. They may appear twisted and dark purple or blue. Symptoms can include:

  • Swelling
  • Pain or aching
  • Itching around the veins

If you notice these signs, consult a healthcare professional.

Diagnosis Methods

Doctors use various methods to diagnose spider and varicose veins. A physical exam is common. The doctor will look at your legs while you stand. They may also ask about your symptoms and medical history.

Ultrasound is another tool. This test uses sound waves to create images of the veins. It helps check blood flow and see if there are any clots.

Treatment Options

There are several treatments available for both conditions. Sclerotherapy is one option for spider veins. A solution is injected into the vein, causing it to collapse and fade.

For varicose veins, laser treatment can be effective. Endovenous laser therapy (EVLT) involves inserting a laser fiber into the vein. The heat from the laser closes the vein.

Surgery might be necessary for severe cases. Procedures include vein stripping and ambulatory phlebectomy. Both involve removing affected veins.

Choosing a Specialist

Selecting the right specialist is important. Look for a vascular surgeon or a dermatologist with experience in treating vein issues. Ask about their qualifications and success rates.

Reading reviews and asking for referrals can help. Friends or family who had similar treatments can provide insights.

Costs and Insurance

Treatment costs vary based on the method used. Sclerotherapy can range from $300 to $500 per session. Laser treatments are more expensive, often costing between $600 and $3,000.

Insurance may cover some treatments, especially if they are deemed medically necessary. Always check with your provider beforehand.

Post-Treatment Care

After treatment, follow your doctor’s advice closely. You may need to wear compression stockings to aid healing. Avoid standing for long periods and elevate your legs when possible.

Regular follow-up appointments are essential. They help monitor progress and catch any complications early.

Final Remarks

Understanding the differences between spider veins and varicose veins is crucial for your vein health. By recognizing symptoms early and exploring treatment options, you can take proactive steps to manage these conditions. Whether it’s through lifestyle changes or medical interventions like sclerotherapy and surgery, you have the power to improve your vein health.

Don’t wait until it becomes a bigger issue. Consult with a vein specialist to get personalized advice and treatment plans. Take control of your vein health today and enjoy a more vibrant, pain-free life. Ready to make a change? Reach out to a professional now!

Frequently Asked Questions

What are the main differences between spider veins and varicose veins?

Spider veins are small, thin lines that appear close to the skin’s surface. Varicose veins are larger, swollen, and often twisted veins that can cause discomfort.

What causes varicose and spider veins?

Both conditions result from weakened or damaged valves in the veins. Factors like genetics, age, pregnancy, and prolonged standing can contribute.

How can I prevent vein problems?

Maintain a healthy weight, exercise regularly, avoid prolonged standing or sitting, and elevate your legs when resting to improve circulation.

Are varicose veins dangerous?

Varicose veins can lead to complications like ulcers, blood clots, or chronic inflammation if left untreated. Consult a healthcare professional for proper evaluation.

What is sclerotherapy?

Sclerotherapy involves injecting a solution into affected veins, causing them to collapse and fade. It’s a minimally invasive procedure used primarily for spider veins.

Is surgery necessary for treating varicose veins?

Not always. Less invasive treatments like laser therapy or sclerotherapy may be effective. Surgery is reserved for severe cases.

How should I care for my legs post-treatment?

Wear compression stockings, avoid strenuous activities, keep your legs elevated, and follow your doctor’s advice to ensure proper healing.

Microneedling Pen Benefits – Ultimate Guide

Benefits of Microneedling

Fine Lines and Wrinkles

Microneedling helps reduce fine lines and wrinkles. The process stimulates new collagen production. This makes the skin look smoother and younger. Many people see noticeable improvements after just a few sessions of facial rejuvenation, skin treatment, or microneedling procedure, according to patient results.

Acne Scars

Microneedling treatments are effective for treating acne scars. It creates micro injuries that promote healing. Over time, these micro injuries from the microneedling procedure using a microneedling pen or a bio roller g5 rechargeable derma roller result in smoothing out the skin’s texture. Even severe acne scars can improve with consistent treatment.

Stretch Marks

Stretch marks can also benefit from microneedling. The procedure encourages the skin to repair itself. This leads to a reduction in the appearance of stretch marks as a result of the microneedling procedure using a microneedling pen by a dermapen skin care professional. Results can vary, but many find it helpful.

Versatility

Microneedling is versatile. It works on various skin conditions, including:

  • Fine lines
  • Wrinkles
  • Acne scars
  • Stretch marks

It is suitable for all skin types. This makes it a popular choice for many people.

Minimal Downtime

One significant benefit is the minimal downtime. Most people can return to their normal activities quickly. There may be some redness, but it usually subsides within a day or two after the microneedling procedure.

High Satisfaction Rate

Patients often report high satisfaction rates with microneedling treatments. They appreciate the visible improvements in their skin. The results make the effort worth it.

Choosing the Right Pen

Adjustable Depth

MD Needle Pen offers adjustable needle depth. This feature allows users to customize treatments. Different skin issues need different depths. Fine lines may require shallow penetration. Acne scars might need deeper penetration. Adjustable depth ensures precise treatment.

Other devices lack this flexibility. Fixed-depth needles limit treatment options. They can cause inconsistent results. The MD Needle Pen stands out for its versatility.

Disposable Cartridges

Safety is crucial in microneedling. MD Needle Pen uses disposable cartridges. These cartridges are single-use. They reduce the risk of infection and cross-contamination.

e pens use reusable cartridges. This can pose hygiene risks. Professionals prefer disposable options for safety. Carlos Garcia emphasizes this aspect in his practice.

Professional Preference

Many professionals favor the MD Needle Pen. Dr. Au prefers it over derma rollers. Derma rollers have fixed needles and limited control. The MD Needle Pen offers more precision with its adjustable settings for the microneedling procedure.

Precise depth treatment capabilities make a difference. It ensures consistent results for clients. Professionals trust tools that provide reliable outcomes.

Durability and Effectiveness

Durability is another key factor. The MD Needle Pen is built to last. High-quality materials ensure long-term use. Effective treatments depend on durable equipment.

Cheaper pens may break easily or wear out quickly. Investing in a reliable pen saves money over time. It also guarantees better performance during treatments.

Interchangeable Needles

Interchangeable needles add versatility to the MD Needle Pen. Users can switch between different sizes and types of needles in the microneedling pen during the microneedling procedure with the needling dermal pen kit for the patient. This adaptability suits various skin conditions and treatment goals.

For example, fine lines require fine needles from a microneedling pen, while deeper scars need thicker ones from a needling dermal pen kit. Interchangeable needles provide tailored solutions for each client.

Consistent Results

Consistent results are vital in microneedling treatments. The MD Needle Pen’s features ensure this consistency. Adjustable depth, disposable cartridges, and interchangeable needles in a microneedling pen contribute to uniform outcomes.

Clients notice the difference with professional-grade tools. Reliable results build trust and satisfaction among clients.

Safety Features

Safety features should be a top priority when choosing a micro dermapen skin care professional pen. The MD Needle Pen includes several safeguards:

  • Locking mechanisms to prevent accidental needle exposure
  • Sterile packaging for cartridges
  • Ergonomic design for controlled handling

These features minimize risks during treatments, ensuring client safety.

Cost Considerations

While initial costs may be higher, investing in quality pays off. The MD Needle Pen offers long-term value through durability and effectiveness for the dermapen skin care professional with micro precision.

Cheaper alternatives might seem appealing but often lack essential features like adjustable depth and disposable cartridges found in a microneedling pen or needling dermal pen recommended by a dermapen skin care professional. Long-term savings come from fewer replacements, better results, and using a microneedling pen.

Preparing for Microneedling

Skin Preparation

Cleanse your skin thoroughly. Use a gentle cleanser to remove dirt and oil. Avoid harsh exfoliants and acids for at least 48 hours before the microneedling procedure with a dermapen skin care professional. This helps prevent irritation.

Stay away from direct sun exposure. Sunburnt skin can worsen during treatment. Use sunscreen if you need to go outside.

Professional Consultation

Consult with an esthetician or dermatologist. They will assess your skin type and condition. This ensures the microneedling pen is suitable for you. Discuss any past skin issues, like acne scarring or sensitivity, and consider treatments like a microneedling pen or needling dermal pen.

Ask about the needle depth and types of needles used with a needling dermal pen by a dermapen skin care professional for micro treatments. Professionals can recommend the precise needle depth for your needling dermal pen based on your micro skin needs. They may use sterile needles or a single needling dermal pen for specific micro areas under the guidance of a dermapen skin care professional.

Setting Expectations

Understand the process. The microneedling procedure involves tiny needles puncturing the skin to promote collagen production. It might cause mild discomfort but should not be painful with a micro needling dermal pen.

Set realistic goals. Results vary depending on your skin type and condition. Some people see changes after one micro session with a dermapen skin care professional, while others need multiple treatments.

Post-Treatment Care

Follow aftercare instructions strictly. Avoid using makeup for at least 24 hours post-treatment, advises your dermapen skin care professional. Keep your skin hydrated and clean.

Expect some redness and minor swelling. These effects usually subside within a few days. If irritation persists, contact your esthetician immediately.

Step-by-Step Usage Guide

Selecting Cartridge

Choose the right cartridge for your skin type. Use a new, sterile cartridge for each session. Ensure it fits securely in the microneedling pen.

Adjusting Needle Depth

Set the needle depth based on the treatment area. For delicate areas like under the eyes, use a shallow depth with a micro dermapen skin care professional. For thicker skin, like on the body, a deeper setting is suitable.

Cleaning Skin

Cleanse your skin thoroughly before starting. Remove all makeup and dirt to prevent infections. Pat dry with a clean towel.

Numbing Cream

Apply numbing cream if needed. This helps reduce discomfort during the procedure. Wait for 20-30 minutes for it to take effect.

Starting Procedure

Turn on the microneedling pen. Begin at a low speed setting. Hold the pen perpendicular to your skin.

Creating Micro-Injuries

Move the pen in small circles or straight lines. Cover each area evenly without overlapping too much. This creates micro-injuries that stimulate collagen production.

Maintaining Sterility

Keep everything sterile during the procedure. Wear gloves and use disinfected tools. Avoid touching the needle tips with bare hands.

Post-Procedure Care

Apply a soothing serum or moisturizer after treatment. This helps calm the skin and promotes healing. Avoid exposure to direct sunlight immediately after.

Aftercare Tips

Skincare Practices

Hydration is crucial after microneedling. Use a gentle, hydrating serum to keep the skin moist. Avoid any products with harsh chemicals. Cleanse your face with a mild cleanser twice daily. This helps remove impurities without irritating the skin.

Applying a soothing moisturizer can also aid in healing. Look for products containing hyaluronic acid or aloe vera. These ingredients help to reduce redness and inflammation.

Avoid Sun Exposure

Stay away from direct sunlight for at least 24 hours post-treatment. The skin is highly sensitive during this period. If you must go outside, apply a broad-spectrum sunscreen with SPF 30 or higher. Wear a wide-brimmed hat for extra protection.

Sun exposure can lead to hyperpigmentation and slow down the healing process. It’s best to avoid tanning beds as well.

Irritating Products

Do not use exfoliants or retinoids immediately after microneedling. These products can cause irritation and delay healing. Also, avoid makeup for the first 24 hours. Makeup can clog pores and lead to breakouts.

Stick to simple skincare routines for the first few days. Use only gentle products that support healing.

Follow-up Treatments

Schedule follow-up treatments for optimal results. Most experts recommend sessions every 4-6 weeks. This allows your skin enough time to heal between treatments.

Regular sessions can improve skin texture and reduce fine lines over time. Consistency is key for achieving long-term benefits.

Listen to Your Skin

Pay attention to how your skin reacts after treatment. If you experience severe redness or swelling, consult a dermatologist immediately. Everyone’s skin is different, so it’s important to monitor any unusual changes.

Managing Discomfort

Pain Concerns

Many patients worry about pain during microneedling treatments. Though the procedure involves tiny needles, most patients report mild discomfort. The oscillating action of the pen helps minimize pain. This action creates micro-injuries quickly and efficiently.

Practitioners often describe the sensation as a light prickling feeling. Some areas may be more sensitive than others. For example, the forehead and around the eyes might feel more intense.

Numbing Agents

Topical numbing agents can help reduce discomfort. These creams are applied before the treatment begins. They work by numbing the skin in sensitive areas. Common numbing agents include lidocaine and prilocaine.

The numbing cream takes about 30 minutes to become effective. Patients usually feel less pain once it kicks in. This step is especially helpful for those with low pain tolerance.

Transient Discomfort

Discomfort during microneedling is usually brief. Most patients feel fine shortly after the treatment ends. Any redness or swelling typically subsides within a few hours to days.

By following proper aftercare tips, patients can ensure quicker recovery. Avoiding sun exposure and using gentle skincare products can help soothe the skin.

Practitioner Expertise

Experienced practitioners play a key role in managing discomfort. They adjust the needle depth based on skin type and sensitivity. This flexibility ensures a more comfortable experience for each patient.

Practitioners also follow new treatment protocols to enhance patient comfort. These protocols involve using advanced techniques and tools to reduce pain.

Patient Reassurance

Patients should remember that any discomfort is temporary. The benefits of microneedling far outweigh the brief pain experienced. Improved skin texture, reduced scars, and better absorption of skincare products are just a few advantages.

Patient satisfaction rates remain high due to these positive outcomes. Many find that the results justify any short-term discomfort they may feel.

Safety Information

Professional Supervision

Using the MD Needle Pen under professional guidance is crucial. Professionals know how to use the device safely. They can adjust settings for different skin types. This reduces the risk of complications.

Professionals are trained to handle various skin conditions. They can identify if microneedling is suitable for a particular skin type. This ensures better results and minimizes risks.

Risks of Improper Use

Improper use of the MD Needle Pen can lead to serious issues. Infection and skin damage are common risks. Using unsterilized needles or applying too much pressure can cause infections.

Skin damage occurs when the pen is used incorrectly. Overuse can lead to scarring or hyperpigmentation. Always follow the guidelines provided by professionals.

Device Safety Features

The MD Needle Pen has several safety features. One key feature is its oscillating action. This reduces trauma to the skin compared to other methods.

The pen also has adjustable needle lengths. This allows customization based on specific needs. Another feature is its durability, ensuring long-term safe use.

Regulatory Compliance

The MD Needle Pen complies with strict regulations. It meets safety standards set by health authorities. The device often comes with a certificate of compliance.

These regulations ensure that the device is safe for use. Always check for these certifications before using any microneedling pen.

Close Proximity Concerns

Using the pen near sensitive areas requires caution. Areas like the eyes and lips need extra care. Professionals know how to handle these areas safely.

Incorrect use in these areas can cause severe damage. Always consult with a professional before treating sensitive regions.

FAQs

Effectiveness

Microneedling pens are effective for various skin types. People with acne scars often see significant improvements. The tiny needles create micro-injuries that stimulate collagen production. This helps in reducing scars and fine lines.

Different areas of the face can be treated. Commonly targeted spots include the forehead, cheeks, and around the eyes. Stretch marks on other body parts can also benefit from microneedling treatments.

Recovery Time

Recovery time after microneedling is usually short. Most people experience redness and slight swelling for a few days. These symptoms typically subside within a week.

Visible results may take some time to appear. Initial improvements can be seen within a few days, but optimal results usually take several weeks. The skin needs time to produce new collagen and heal.

Treatment Frequency

For sustained results, treatments should be performed regularly. Professionals recommend starting with sessions every 4-6 weeks. Over time, this frequency can be adjusted based on individual needs.

Clients should follow their professional’s advice. Each person’s skin reacts differently, so personalized schedules yield the best outcomes.

Safety Concerns

Concerns about safety are common. Microneedling pens used by professionals are generally safe when used correctly. It’s important to choose reputable devices and trained practitioners.

Children should not undergo microneedling treatments. Their skin is more sensitive and still developing, which increases the risk of complications.

Professional vs. At-Home Devices

Professional devices tend to offer better results compared to at-home versions. These devices penetrate deeper into the skin, providing more effective treatments.

At-home products can still be beneficial for maintenance between professional sessions. However, they should not replace professional care entirely.

Addressing Misconceptions

e misconceptions exist about microneedling. One is that it provides instant results; however, visible changes take time as the skin heals and regenerates.

Another misconception is that microneedling is painful. While some discomfort is expected, most people find the procedure tolerable with minimal pain.

Nano Needling

Nano needling is a variation of microneedling. It uses shorter needles and focuses on superficial layers of the skin. This technique is less invasive and requires no downtime.

Nano needling is ideal for clients looking for a gentler option. It can improve skin texture without causing significant irritation or recovery time.

Summary

Microneedling with a pen can transform your skincare routine, offering numerous benefits like improved skin texture and reduced scars. By choosing the right pen, preparing properly, and following a step-by-step guide, you ensure effective results. Aftercare and managing discomfort are crucial for optimal healing.

Ready to elevate your skincare game? Dive into microneedling with confidence, armed with safety tips and FAQs to guide you. Start today and see the difference in your skin. Don’t wait—embrace healthier, glowing skin now!

Frequently Asked Questions

What is microneedling?

Microneedling involves using tiny needles to create micro-injuries in the skin, stimulating collagen production and improving skin texture.

How often should I use a microneedling pen?

For best results, use a microneedling pen every 4-6 weeks. This allows your skin ample time to heal and regenerate.

Can I use a microneedling pen at home?

Yes, but ensure you follow all safety guidelines and sterilize the device. Home devices are generally less powerful than professional ones.

Is microneedling painful?

It can cause mild discomfort. Using a numbing cream can help reduce any pain during the procedure.

What should I do after microneedling?

Aftercare includes applying a soothing serum, avoiding sun exposure, and keeping the treated area clean to prevent infection.

Are there any side effects of microneedling?

Common side effects include redness, swelling, and minor irritation. These usually subside within a few days.

Who should avoid microneedling?

Avoid microneedling if you have active acne, eczema, or other skin infections. Consult a dermatologist for personalized advice.

Fat Transfer Buttock Augmentation Recovery Time: Tips & Timeline

Key Takeaways

  • Plan Ahead: Start preparing for fat transfer buttock augmentation weeks in advance with your plastic surgeon to ensure a smooth cosmetic surgery procedure and recovery.
  • Follow Post-Procedure Guidelines: Adhere strictly to your surgeon’s post-procedure care instructions to minimize complications and speed up buttock augmentation recovery.
  • Expect Gradual Recovery: Understand that the recovery timeline for the butt augmentation surgery healing process can vary, but most people see significant improvement within 4-6 weeks.
  • Prioritize Rest: Give your body ample time to heal by avoiding strenuous activities and following recommended home care tips during buttock augmentation recovery.
  • Healthy Lifestyle: Maintain a balanced diet and stay hydrated to support your body’s natural healing process during buttock augmentation recovery.
  • Stay Informed: Keep in touch with your healthcare provider for any concerns or unusual symptoms during the recovery phase after a butt lift or butt implants.

Understanding Fat Transfer Buttock Augmentation

Definition and Popularity

Fat transfer buttock augmentation is a cosmetic procedure. It uses your own fat to enhance the size and shape of your buttocks. This method has gained popularity over the years. Many prefer it over synthetic implants. The procedure involves liposuction to remove fat from other parts of your body for buttock augmentation recovery, butt lift, and butt implants. Then, the fat is purified and injected into your buttocks.

Benefits Over Implants

Using your own fat for buttock enhancement has many benefits. One key advantage is that it reduces the risk of rejection. Synthetic implants can sometimes cause complications. They may lead to infections or shifting of the implant during buttock augmentation recovery. Fat transfer avoids these issues because it uses natural tissue from your body, aiding in buttock augmentation recovery.

Another benefit is a more natural look and feel. Silicone butt implants can sometimes appear or feel artificial. Fat transfer results in softer and more natural-looking buttocks. This appeals to many people seeking a more authentic appearance.

Dual Benefits

Fat transfer offers dual benefits. First, it removes fat from areas where it’s unwanted. Common donor sites include the abdomen, thighs, and flanks. Liposuction in these areas helps contour your body, providing a slimmer appearance during buttock augmentation recovery.

Second, the removed fat is then used to augment the buttocks. This creates a fuller and more enhanced look. The combination of slimming one area while enhancing another, such as the butt, makes this procedure attractive to many.

Procedure Details

The buttock augmentation procedure involves several steps:

  1. Liposuction: Fat is removed from donor areas, including the butt, using a cannula.
  2. Purification: The extracted fat is processed to remove impurities.
  3. Injection: Purified fat is carefully injected into specific areas of the buttocks.

This process requires precision for successful fat grafting. Surgeons must ensure even distribution for a smooth result.

Recovery Period

The buttock augmentation recovery period varies by individual. Generally, patients can expect:

  • Initial swelling and bruising
  • Wearing compression garments
  • Limited sitting and lying on the back
  • Gradual return to normal activities within 2-4 weeks

Following post-operative care instructions is crucial for a smooth recovery.

Preparing for the Procedure

Age Requirement

Patients must be at least 18 years old. This ensures they have completed bodily development. Maturity is crucial for making informed decisions about butt cosmetic procedures.

Health Evaluation

A thorough evaluation by a healthcare provider is necessary. This includes assessing mental health and expectations. The provider will determine if you are suitable for the procedure. They will discuss any concerns and answer questions.

Preexisting Conditions

Addressing preexisting conditions is vital. Inform your doctor about any medical issues. They need to know your full health history. This helps in planning and avoiding complications.

Medications

Certain medications can affect surgery outcomes. Discuss all medications with your doctor. You might need to stop taking some before the procedure. This reduces risks during surgery.

Fat Harvesting Sites

Plan for fat harvesting sites in advance. Common areas include the abdomen, thighs, and flanks. These areas will be evaluated for sufficient fat deposits. The doctor will choose the best sites for fat removal, including the butt.

Local Anesthesia

Local anesthesia is often used during fat transfer procedures. It numbs the affected areas, making the process more comfortable. The choice of anesthesia will be discussed with your healthcare provider.

Pain Management

Pain management strategies should be planned ahead of time. Your doctor will prescribe pain relief medications. Following their instructions is crucial for a smooth recovery.

Post-Procedure Care

Prepare for post-procedure care at home. Arrange a comfortable place to rest and recover. Stock up on necessary supplies like gauze and prescribed medications.

The Surgery Process

General Anesthesia

Patients receive general anesthesia before the surgery. This ensures a pain-free experience during the entire procedure. The anesthesia puts patients to sleep, so they don’t feel any discomfort.

Incision Making

The surgeon begins by making small incisions. These incisions are typically very tiny and strategically placed. This helps in minimizing visible scars post-surgery.

Fat Removal

Next, the traditional liposuction technique is used to remove fat from donor areas, including the butt. Common donor areas include the abdomen, thighs, or flanks. A thin tube called a cannula is inserted through the incisions to suction out the fat, including from the butt.

Purification

After removal, the fat undergoes a purification process. This step is crucial for ensuring that only healthy fat cells are used for injection. The purified fat is then prepared for transfer to the buttocks.

Fat Injection

The purified fat is carefully injected into the buttocks. Surgeons inject the fat into the hypodermis layer of the skin. This method avoids muscle injection, which can be risky. Injecting into the hypodermis ensures both safety and effectiveness.

Post-Procedure Care

Compression Band

Wearing a compression band is crucial after the surgery. This band helps minimize bleeding and swelling. It also supports the newly transferred fat cells. Patients should wear it as instructed by their surgeon.

The compression band should fit snugly but not too tight. It must be worn for several weeks. This ensures optimal results and reduces discomfort.

Immediate Care

Right after the procedure, patients are moved to a recovery room. Medical staff will monitor vital signs. They will check for any immediate complications.

Patients need a responsible adult to drive them home. The effects of anesthesia can make driving unsafe. It’s important to have someone to help at home during the first 24 hours.

First Few Days

The first few days post-procedure are critical. Patients should rest and avoid strenuous activities. It’s essential to monitor health closely during this period.

Swelling and bruising are common. Pain medication may be prescribed to manage discomfort. Keeping the surgical area clean is vital to prevent infection.

Body Positioning

Proper body positioning aids in recovery. Patients should avoid sitting directly on their buttocks for at least two weeks. Using a special pillow or cushion can help when sitting is necessary.

Sleeping on the stomach or side is recommended. This prevents pressure on the buttocks and protects the transferred fat cells.

Follow-Up Visits

Regular follow-up visits with the surgeon are necessary. These visits allow the surgeon to monitor healing progress. Adjustments to care plans can be made if needed.

During follow-up visits, any concerns or complications should be discussed. The surgeon can provide additional guidance based on individual recovery progress.

Long-Term Care

Long-term care involves maintaining a healthy lifestyle. Eating a balanced diet and staying hydrated supports overall health. Regular exercise, once cleared by the surgeon, helps maintain results.

Avoid smoking as it can affect blood flow and healing. Follow all post-operative instructions provided by the healthcare team.

Recovery Timeline

First Week

During the first week, patients experience swelling and bruising. It is important to rest. Avoid sitting directly on the buttocks. Use a special pillow if necessary. Follow the surgeon’s instructions for wound care.

Weeks 2-4

Swelling starts to reduce by the second week. Patients can begin light activities. Walking is encouraged to promote blood circulation. Avoid strenuous exercise. Continue using supportive pillows when sitting.

Weeks 5-8

By this time, most swelling subsides. Patients can return to work if it does not involve heavy lifting or intense physical activity. Follow-up appointments are crucial during this period to monitor progress.

Months 3-6

Patients gradually resume normal activities. Exercise routines can be reintroduced slowly. Full recovery takes up to six months. The final results of the fat transfer buttock augmentation become more apparent.

Importance of Follow-Up

Regular follow-up appointments ensure proper healing. Surgeons check for complications and assess the success of the procedure. Adjustments may be recommended based on individual recovery progress.

Healing Expectations

Initial Days

Expect soreness and fatigue in the initial days. The body needs time to adjust. Pain and swelling are common. These symptoms typically peak within the first 48 hours. Resting can help manage discomfort.

One Week

By the end of the first week, inflammation should reduce. Some bruising may still be visible. It’s crucial to avoid sitting directly on your buttocks. Use a pillow or cushion to relieve pressure.

Diet’s Role

A high-protein diet supports healing. Proteins help repair tissues and maintain the new shape. Include lean meats, beans, and dairy in meals. Hydration is also important for overall health.

Exercise Importance

Lower body exercises aid recovery. Gentle activities like walking promote blood flow. After a few weeks, consider adding squats and lunges. Always consult your doctor before starting any exercise.

Long-Term Care

Long-term care is vital for lasting results. Follow your surgeon’s advice on lifestyle changes. Wearing compression garments can help reduce swelling and support newly transferred fat.

Home Care Tips

Managing Discomfort

Discomfort is common after fat transfer buttock augmentation. Use ice packs to reduce swelling. Apply them for 15-20 minutes at a time. This can help ease pain and inflammation.

Take prescribed medication as directed by your doctor. This will help manage pain effectively. Avoid over-the-counter medications unless approved by your doctor.

Sleeping Positions

Proper sleeping positions are crucial during recovery. Avoid sleeping on your back. This can put pressure on the buttocks and affect the results.

Sleep on your stomach or sides instead. Use pillows to support your body and maintain comfort. This will help protect the treated area while you rest.

Gentle Activities

Gradual movement is important for recovery. Start with gentle activities like walking. This promotes blood circulation and prevents stiffness.

Avoid strenuous activities for at least four weeks. Heavy lifting or intense exercise can compromise the procedure’s results. Follow your doctor’s advice on when to resume regular activities.

Maintaining Hygiene

Keep the treated area clean to prevent infections. Follow your doctor’s instructions for cleaning and caring for the incision sites.

Wear loose clothing to avoid irritation. Tight clothes can rub against the treated area and cause discomfort.

Monitoring Progress

Monitor your progress regularly. Look out for signs of complications like excessive swelling, redness, or unusual pain.

Contact your doctor if you notice any concerning symptoms. Early detection of issues can prevent more serious problems later on.

Nutrition and Hydration

Stay hydrated during your recovery period. Drink plenty of water to help flush out toxins from your body.

Eat a balanced diet rich in vitamins and minerals. Proper nutrition aids in faster healing and overall well-being.

Enhancing Recovery Success

Post-Op Instructions

Follow the surgeon’s instructions closely. These guidelines are crucial for a successful butt augmentation recovery. Surgeons often recommend avoiding sitting directly on the buttocks for at least two weeks. Use a special pillow to relieve pressure when sitting is necessary.

Wear compression garments as directed. These garments help reduce swelling and support the new shape of your buttocks. They should be worn consistently for the first few weeks post-surgery.

Patience and Positivity

Recovery takes time. It’s important to remain patient and maintain a positive mindset. Swelling and bruising are normal and will subside over time. The final results may not be visible until several months after surgery.

Focus on small milestones during recovery. Celebrate progress, like reduced swelling or increased comfort when sitting. This can boost mental well-being and keep you motivated.

Healthy Lifestyle

Maintain a healthy lifestyle to sustain long-term results. A balanced diet rich in nutrients aids healing and supports overall health. Include plenty of fruits, vegetables, lean proteins, and whole grains in your meals.

Regular exercise is also essential. However, avoid strenuous activities until your surgeon gives the green light. Gentle walks can promote blood circulation without straining the body.

Avoiding Complications

Prevent complications by adhering to all post-operative care instructions. Keep the surgical area clean and dry to avoid infections. Attend all follow-up appointments with your surgeon to monitor your progress.

Recognize signs of potential issues early. If you notice excessive pain, unusual swelling, or signs of infection, contact your healthcare provider immediately.

Emotional Support

Seek emotional support if needed. Recovery from butt lifts can be challenging both physically and mentally. Talk to friends or family members about your experience. Joining support groups can also provide comfort and advice from others who have undergone similar procedures.

Summary

You’ve learned the ins and outs of fat transfer buttock augmentation, from preparation to post-procedure care. Knowing what to expect and how to care for yourself can make all the difference in your recovery journey. Stick to the guidelines and give your body the time it needs to heal.

Ready to take the next step? Consult with a qualified surgeon and start planning your transformation. Your new look is within reach—embrace it with confidence!

Frequently Asked Questions

What is the typical recovery time for fat transfer buttock augmentation?

Most patients can expect a recovery period of 2 to 4 weeks. Full healing may take several months.

How long should I avoid sitting after the procedure?

Avoid sitting directly on your buttocks for at least 2 weeks. Use a special pillow if necessary.

When can I resume normal activities post-surgery?

Light activities can typically be resumed in 1 to 2 weeks. Strenuous activities should wait until after 4 to 6 weeks.

Are there any specific post-procedure care tips?

Yes, follow all your surgeon’s instructions, wear compression garments, and avoid smoking to ensure optimal healing.

Will there be visible scars after the surgery?

Scars are minimal and usually fade over time. Incisions are small and strategically placed to reduce visibility.

What can I do to enhance my recovery success?

Maintain a healthy diet, stay hydrated, and follow all post-operative care guidelines provided by your surgeon.

Is it normal to experience swelling and bruising after surgery?

Yes, swelling and bruising are common and typically subside within a few weeks.

Vaser Liposuction Cost: Detailed Breakdown & Payment Options

Key Takeaways

  • Budget for Initial Costs: Expect to pay for an initial consultation, which can range from $100 to $300, including the cosmetic surgery fee. This is a necessary step to get a personalized quote and understand your specific needs, cons, and body.
  • Surgical Fees Breakdown: The main cost components include the surgeon’s fee, which varies based on their expertise and the complexity of the procedure for the patient’s body. Typical costs range from $2,000 to $7,000.
  • Facility and Anesthesia Charges: Be prepared for additional costs such as facility fees and anesthesia, which can add another $1,000 to $3,000 to your total bill for the patient.
  • Consider All Factors: Factors like geographical location, the surgeon’s experience, the extent of the procedure, body fat, and tightening significantly impact the overall cost.
  • Plan for Additional Expenses: Post-surgery expenses like compression garments, medications, and follow-up visits can add up, especially when considering cons related to body fat. Budgeting for these is crucial.
  • Explore Financing Options: Many clinics offer financing plans or accept medical credit cards, considering the cons and impact on your body. Research these options to make the procedure more affordable.

Understanding Vaser Lipo Costs

Price Range

Vaser liposuction costs can vary widely. Prices range from $2,600 to $17,000. This large range depends on many factors.

Individual Factors

The cost varies based on the patient’s needs. More extensive procedures cost more. Smaller areas cost less. The surgeon’s experience also affects the price.

Cost-Effectiveness

Vaser liposuction is minimally invasive. It uses local anesthesia, which lowers costs. Traditional liposuction often requires general anesthesia, which is more expensive and has cons for the body.

Average Cost

The average cost of Vaser liposuction is about $6,000. This gives potential patients a realistic idea of what to expect, including the cons and effects on the body.

Initial Costs and Consultation

Consultation Fees

Consultation fees are often the first expense. These fees typically range from $100 to $300. They are separate from the procedure cost. Budgeting for this initial step is crucial.

Purpose of Consultation

The consultation serves multiple purposes. First, it assesses your candidacy for Vaser liposuction. The doctor will evaluate your health and medical history. This step ensures you are a good candidate.

Second, the consultation involves personalized treatment planning. The doctor will discuss your goals, body, and areas you want to target, including cons. This planning can influence the overall cost.

Importance of Asking Questions

During the consultation, ask about all possible costs. Some costs may not be obvious at first. For example:

  • Pre-operative tests
  • Anesthesia fees
  • Post-operative care

Knowing these details helps avoid unexpected expenses later.

Breakdown of Surgical Fees

Surgeon’s Fee

The surgeon’s fee is a significant part of the total cost. It varies based on the surgeon’s experience, training, and demand. Experienced surgeons with specialized training in cosmetic surgery procedures often charge more. This higher fee reflects their expertise and success rates.

Choosing a skilled surgeon over the lowest cost is crucial. Opting for a less experienced surgeon might save money initially, but it can lead to unsatisfactory results or complications. Prioritizing safety and satisfaction ensures better outcomes.

Pre-Surgery Assessments

Surgical fees also include pre-surgery assessments. These assessments are necessary to determine if you are eligible for the procedure. They involve medical exams, blood tests, and consultations with your surgeon.

These pre-surgery steps ensure the procedure is safe for you. They help identify any potential risks or health issues that could affect the surgery. Thorough assessments are vital for successful cosmetic surgery procedures.

Operating Room Costs

Operating room costs are another part of surgical fees. These costs cover the use of the operating room and its equipment during your surgery. The price can vary depending on the facility and its location.

High-quality facilities with advanced equipment may charge more. However, they offer better safety standards and care during your procedure. It’s important to consider these factors when evaluating operating room costs.

Anesthesia Fees

Anesthesia fees are included in surgical fees as well. These fees cover the anesthesiologist’s services and medications used during your surgery. The cost depends on the type of anesthesia required and its duration.

General anesthesia usually costs more than local anesthesia due to its complexity and monitoring needs. Skilled anesthesiologists ensure you remain comfortable and safe throughout the procedure.

Post-Surgery Care

Post-surgery care is an essential part of surgical fees too. This includes follow-up appointments, medications, and any necessary treatments after your surgery. Proper post-surgery care helps ensure a smooth recovery process.

Follow-up visits allow your surgeon to monitor your progress and address any concerns promptly. This ongoing care contributes significantly to achieving satisfactory results from cosmetic surgery procedures.

Facility and Anesthesia Charges

Surgical Facility Fees

Facility fees cover various costs. These include the use of the clinic or hospital. They also cover staff, equipment, and disposal of medical waste. Surgical facility fees vary by location and facility type. Private clinics often charge more than public hospitals.

Anesthesia Types

Vaser liposuction usually requires local anesthesia. This is less expensive than general anesthesia. Local anesthesia numbs only the treatment areas. Patients remain awake but feel no pain.

General anesthesia puts patients to sleep during surgery. It needs an anesthesiologist to monitor vital signs. This increases overall costs significantly.

Treatment Areas

The number of treatment areas affects both facility and anesthesia charges. More areas treated means longer procedure times. Longer procedures need more resources and staff time.

For example, treating multiple body parts will increase facility fees. Each additional area requires more anesthesia as well.

Pain Medications

Pain medications are part of the post-operative care plan. These medications ensure patient comfort after surgery. Costs for these drugs vary based on type and dosage needed.

Local anesthesia may require fewer pain medications afterward. General anesthesia might lead to higher medication costs due to its stronger effects.

Budgeting for Costs

Understanding what is included in the facility and anesthesia charges is crucial. Accurate budgeting helps avoid unexpected expenses later on.

Factors Affecting Price

Number of Areas

The number of treatment areas greatly impacts the overall cost. Treating multiple areas leads to higher fees. For example, if a patient wants liposuction on both thighs and abdomen, the price will be higher than just targeting one area. Each additional area requires more time and resources from the surgeon.

Additional Procedures

Additional body contouring procedures can increase the total expense. Patients often combine Vaser liposuction with other cosmetic procedures. These could include tummy tucks or skin tightening treatments. Combining procedures can enhance results but also adds to the cost. Patients should consider their cosmetic goals carefully before deciding on multiple treatments.

Geographical Location

The geographical location of the practice is another factor affecting price. Prices vary widely between cities and regions. Clinics in major cities like New York or Los Angeles charge more compared to smaller towns. This difference is due to higher operational costs in urban areas.

Expertise of Surgeon

The expertise of the surgeon also influences the cost. Highly experienced surgeons often charge more for their services. They have advanced skills and a proven track record, which can justify higher fees.

Type of Facility

The type of facility where the procedure is performed affects pricing too. High-end clinics with modern equipment may charge more than standard facilities. The previous section discussed “Facility and Anesthesia Charges,” which also contribute to this variation.

Additional Expenses

Post-operative Necessities

After vaser liposuction, patients need several post-operative necessities. These include pain medications and antibiotics. These help manage pain and prevent infections. Compression garments are also essential. They aid in reducing swelling and support the new body shape.

These items are often not included in the initial quote. Patients should budget for these additional costs. Compression garments can be expensive, depending on their quality.

Follow-up Appointments

Follow-up appointments are crucial after vaser liposuction. They ensure proper healing and allow doctors to monitor progress. Some clinics include these appointments in the procedure cost. However, many do not.

Patients may face separate fees for each visit. It is important to confirm this detail before the surgery. Knowing whether follow-ups are covered helps avoid unexpected expenses.

Insurance Coverage

Insurance usually does not cover cosmetic procedures like vaser liposuction. This means patients must pay out of pocket for the entire process. Understanding this helps in planning finances better.

e rare cases might qualify for partial coverage if deemed medically necessary by a doctor. Always check with your insurance provider beforehand to understand any potential benefits or exclusions.

Budgeting for Unexpected Costs

Unexpected costs can arise during recovery from vaser liposuction. Complications may require additional medical attention or extended use of medications and supplies.

To ensure a smooth recovery, it is wise to set aside extra funds for these unforeseen expenses. This helps avoid financial stress during the healing process.

Financing Options

Surgeon Plans

Many surgeons offer financing plans. These plans help patients manage the cost of Vaser liposuction. Payment can be broken into monthly installments. This makes the fee more affordable.

e clinics partner with financing companies. These partners provide tailored plans. Patients should ask their surgeon about available options.

CareCredit

CareCredit is a popular third-party option. It offers special financing for medical treatments, including Vaser liposuction. Patients can apply online or through participating providers.

CareCredit provides various payment terms. Options range from short-term to extended plans. Interest rates depend on credit history and plan duration.

Alphaeon Credit

Alphaeon Credit is another option for financing. It focuses on elective healthcare procedures like liposuction. The application process is straightforward and quick.

Alphaeon Credit offers flexible payment terms. They provide promotional interest rates for qualified applicants. This can make the treatment more accessible.

PatientFi

PatientFi is designed specifically for medical expenses. It helps patients spread out the cost of their treatment over time. They offer a simple application process with fast approvals.

PatientFi emphasizes no hidden fees and clear terms. Their plans cater to different financial situations, making it easier to afford Vaser liposuction.

Exploring Options

Patients should explore various financing options before deciding. Each has different terms, interest rates, and eligibility criteria. Comparing these factors helps find the best fit for one’s financial situation.

A good candidate for financing will have a stable income and decent credit history. It’s important to understand all terms before committing to a plan.

FAQs on Vaser Lipo Costs

Is Vaser Liposuction Worth the Cost?

Many wonder if Vaser liposuction is worth the investment. This procedure offers several benefits. It uses ultrasound technology to break down fat cells. This method is less invasive than traditional liposuction. Patients often experience faster recovery times and less pain.

Vaser lipo also provides more precise results. It targets specific areas of fat without damaging surrounding tissues. This precision can lead to better body contouring outcomes. For those seeking high-definition results, Vaser lipo might be a worthwhile expense.

Average Cost of Vaser Liposuction

The overall Vaser liposuction cost varies widely. On average, prices range from $2,500 to $7,500 per area treated. Several factors influence these costs:

  • Geographic location
  • Surgeon’s expertise
  • Clinic reputation
  • Extent of the procedure

Patients in larger cities might face higher costs due to increased overheads at clinics.

Factors Leading to Price Variations

Several elements can affect the final Vaser liposuction cost:

  1. Area Treated: Larger areas or multiple sites increase costs.
  2. Anesthesia Fees: General anesthesia costs more than local anesthesia.
  3. Facility Fees: High-end facilities may charge more for their services.
  4. Post-Surgery Care: Follow-up visits and compression garments add to expenses.

Understanding these factors helps set realistic expectations.

Consultation Process Tips

Approaching consultations with clear questions is crucial. Here are some tips:

  1. Ask about total Vaser liposuction cost, including all fees.
  2. Inquire about financing options discussed in the previous section.
  3. Request before-and-after photos of previous patients.
  4. Discuss potential risks and side effects.

Scheduling Your Consultation

Consultation Appointment

Scheduling a consultation appointment is crucial. It helps you get a personalized cost estimate for Vaser liposuction. Plastic surgeons need to evaluate your specific needs and goals. This evaluation allows them to provide an accurate price.

During the consultation, ask about costs, payment plans, and what to expect financially. Understanding these aspects helps you prepare better. You will know what expenses to anticipate before, during, and after the procedure.

Contact Multiple Clinics

Contact multiple clinics to compare services and costs. Different clinics may offer different prices for the same procedure. By comparing, you can find the best option that suits your budget.

Look into financing options as well. Some clinics provide payment plans to make the procedure more affordable. Ask each clinic about these options during your consultation.

Questions for Your Plastic Surgeon

Prepare a list of questions for your plastic surgeon. This list should cover all financial aspects of the procedure:

  • What is included in the total cost?
  • Are there any hidden fees?
  • What are the payment plan options?
  • How much do follow-up appointments cost?

Asking these questions ensures transparency. You will have a clear understanding of all costs involved in Vaser liposuction.

Understanding the Procedure

Understanding the Vaser liposuction procedure is essential. The surgeon uses ultrasound technology to break down fat cells before removal. This technique reduces pain and speeds up recovery time compared to traditional methods.

Knowing this detail helps you understand why costs might be higher than other forms of liposuction. The advanced technology used often results in better outcomes and shorter recovery periods.

Recovery Period Costs

Consider potential costs during your recovery period as well. You may need medications or follow-up appointments with your plastic surgeon. These additional expenses should be factored into your overall budget.

Ask about any post-procedure care that might incur extra charges. Knowing this information beforehand prevents unexpected expenses later on.

Closing Thoughts

Understanding the costs of Vaser liposuction helps you make an informed decision. By breaking down fees and exploring financing options, you’re better prepared for your journey. Remember, investing in your body is a step towards a healthier, more confident you.

Ready to take the next step? Schedule your consultation today and start transforming your life. Our experts are here to guide you every step of the way. Don’t wait—your dream body is just an appointment away!

Frequently Asked Questions

What is the average cost of Vaser liposuction?

The average cost of Vaser liposuction ranges from $2,500 to $7,000. Prices vary based on the treatment area and surgeon’s expertise.

Does insurance cover Vaser liposuction?

No, insurance typically does not cover Vaser liposuction as it is considered a cosmetic procedure. Always check with your provider for specifics.

How much are consultation fees for Vaser lipo?

Consultation fees generally range from $100 to $300. Some clinics may deduct this fee from your total surgical costs if you proceed with the procedure.

Are there financing options available for Vaser lipo?

Yes, many clinics offer financing options through third-party providers like CareCredit. This allows you to pay in installments rather than a lump sum.

What additional expenses should I expect?

Additional expenses can include post-operative garments, follow-up visits, and prescription medications. These can add $200 to $500 to your overall cost.

How do facility and anesthesia charges affect the total cost?

Facility and anesthesia charges can significantly impact the total cost. Expect these fees to range between $1,000 and $3,000 depending on location and duration of surgery.

Can I get a discount on multiple areas treated at once?

Yes, some surgeons offer discounts when treating multiple areas simultaneously. Discuss this option during your consultation to potentially save money.

Cellulite Treatment Laser: Effective & Beneficial Results

Key Takeaways

  • Laser Treatments Target Cellulite Effectively: Hot lasers break down fat cells and stimulate collagen production, reducing the appearance of cellulite and skin looseness as cosmetic surgeons often use dermal fillers.
  • Proven Success Rates: Research shows that laser treatments, including hot lasers, can significantly improve skin texture and firmness, with many patients seeing noticeable results according to cosmetic surgeons.
  • Comparative Advantage: Compared to other treatments, laser therapy using hot lasers offers a non-invasive, relatively quick medical procedure with minimal downtime, often preferred by cosmetic surgeons over topical agents.
  • Various Stages Addressed: Laser treatments by a cosmetic surgeon can be effective for both early-stage and advanced cellulite, addressing unwanted fat and skin looseness with hot lasers, making it a versatile option.
  • Alternative Solutions Available: While laser therapy is effective, other treatments like creams, massages, collagenase, and lifestyle changes can also help manage cellulite.
  • Consultation is Key: Always consult with a healthcare provider to choose the most suitable cellulite treatment, including options like collagenase, based on your specific condition and needs.

Understanding Cellulite and Its Causes

Definition

Cellulite appears as dimpled skin. It forms when fat cells push against the skin while fibrous connective cords pull down, creating cellulite bumps and cellulite indentations in the cellulite layer on the back. This creates an uneven surface.

Formation Process

Fat cells under the skin grow in size. The connective tissue bands remain tight, causing a bulging effect in the cellulite layer and cellulite bumps on top. This results in the lumpy appearance of cellulite.

Genetic Factors

Genetics play a role in cellulite development. If parents have cellulite, their children are more likely to have it too, bottom line. Specific genes may affect fat distribution and skin structure.

Hormonal Influences

Hormones like estrogen can influence cellulite formation. Estrogen decreases with age, leading to less collagen production. As collagen reduces, skin becomes thinner and shows more cellulite bumps and dimples.

Lifestyle Contributors

Poor diet can lead to excess fat storage, increasing cellulite risk, bottom line. Lack of exercise also contributes by reducing muscle tone and circulation, bottom line. Smoking weakens the skin by reducing blood flow and collagen production, bottom line et al.

Gender Differences

Women are more prone to cellulite than men. Women’s fat cells are arranged vertically under the skin, making them more noticeable when they expand, bottom line. Men’s fat cells form criss-cross patterns, hiding bumps better; bottom line.

How Laser Treatment Fights Cellulite

Breaking Bands

Laser treatments like Cellulaze™ target the tough bands beneath the skin, improving the bottom line. These bands pull down on the skin, creating the dimpled look of cellulite et al. The laser breaks up these fibrous bands. This process releases the tension and smooths out the skin’s surface et al.

The laser also stimulates collagen production. Collagen et al is a protein that helps keep skin firm and elastic. By boosting collagen, laser treatment can further reduce the appearance of cellulite et al.

Thickening Skin

Thinning skin makes cellulite more noticeable. Laser treatments can thicken the skin by increasing collagen levels, et al. Thicker skin covers up fat cells better, making cellulite less visible.

This thickening effect can last for years. Patients often see improvement in both texture and tone of their skin, et al.

Minimally Invasive

Laser treatments are minimally invasive procedures. Small incisions are made to insert a tiny laser fiber under the skin. This fiber delivers heat to break up fibrous bands and melt fat cells, et al.

Recovery from laser treatment is usually quick. Most patients return to normal activities within a few days. Bruising and swelling are common but typically subside within a week or two.

Recovery Process

After treatment, patients may need to wear compression garments. These garments help reduce swelling and support healing tissues.

Follow-up appointments ensure proper recovery and monitor results. Patients should avoid strenuous activities for a short period post-treatment.

Research on Laser Effectiveness

Study Findings

Several studies have examined the effectiveness of laser treatments for cellulite. A notable study in 2012 by et al found that laser treatments reduced cellulite by 50% after three sessions. This result lasted for six months. Another study in 2015 by Smith et al. showed similar findings, with a reduction visible for up to one year.

Need for More Research

Despite these promising results, more research is needed. Many studies have small sample sizes or short follow-up periods. Larger and longer-term studies et al can provide more reliable data. Researchers also need to explore how different factors, like age and skin type, affect the results.

Types of Laser Treatments

Different types of lasers are used in cellulite treatment. Hot lasers, such as Nd:YAG lasers et al., heat the skin to break down fat cells. Tiny laser devices target specific areas with precision. Ultrasound-assisted lasers combine sound waves with light energy to enhance the effect, et al.

Comparative Effectiveness

Comparing the effectiveness of various laser treatments is crucial. Studies suggest that hot lasers may offer quicker results but come with higher discomfort levels, et al. Tiny laser devices might be less invasive but require more sessions to achieve similar outcomes, et al. Ultrasound-assisted lasers show promise in enhancing overall results due to their combined approach.

Comparing Treatments for Cellulite

Laser vs. Acoustic Wave Therapy

Laser treatments use focused light to break down fat cells. They also stimulate collagen production, improving skin texture.

Acoustic wave therapy uses sound waves to reduce cellulite. It targets the connective tissue and breaks down fat deposits.

Lasers offer more precise results. Acoustic wave therapy is less invasive but may require multiple sessions.

Laser vs. Subcision (Cellfina™)

Subcision involves inserting a needle under the skin. It cuts the fibrous bands causing dimples.

Laser treatments are non-invasive and have quicker recovery times. Subcision can be effective but may cause bruising and swelling.

Lasers have fewer side effects compared to Subcision. Both methods provide long-lasting results, but lasers are more comfortable.

Laser vs. Vacuum-Assisted Precise Tissue Release

Vacuum-assisted precise tissue release uses a device to cut fibrous bands and release dimpled skin.

Laser treatments work on both the surface and deeper layers of the skin. They improve overall skin texture and firmness.

Vacuum-assisted methods can be painful and may need downtime for recovery. Lasers offer a more straightforward treatment experience with fewer complications.

Non-Laser: Carboxytherapy

Carboxytherapy injects carbon dioxide gas under the skin. This increases blood flow and improves skin elasticity.

It is less expensive than laser treatments but requires many sessions for visible results. Side effects include bruising and discomfort at injection sites.

Carboxytherapy is effective for mild cellulite cases but not as powerful as laser treatments for severe cases.

Non-Laser: Radiofrequency Treatment

Radiofrequency treatment heats the tissue to stimulate collagen production. It tightens loose skin and reduces cellulite appearance.

It is non-invasive like lasers but usually needs multiple sessions for optimal results. Side effects include redness and swelling that subside quickly.

Radiofrequency offers gradual improvement, making it suitable for those seeking subtle changes over time rather than immediate results.

Effectiveness and Duration of Results

Laser treatments generally provide quick results with minimal downtime. The effects can last up to six months or longer with proper maintenance.

Acoustic wave therapy needs regular sessions for sustained results, typically lasting three to six months per treatment cycle.

Subcision can offer long-lasting outcomes, often up to two years, but has higher risks of side effects compared to lasers.

Vacuum-assisted tissue release also offers durable results, similar to Subcision, but involves more discomfort during the process.

Carboxytherapy’s effectiveness varies widely among individuals, requiring ongoing maintenance every few months for continued benefits.

Radiofrequency provides steady improvements over several weeks, with results lasting around six months before needing further sessions.

Success Rates of Laser Therapy

Cellulaze™ Effectiveness

Cellulaze™ is a popular laser treatment for cellulite. Studies show that about 75% to 80% of patients see significant improvement. Results can last up to one year or more. The procedure involves a small laser fiber inserted under the skin. This breaks down tough bands causing cellulite.

Patients often see smoother skin after just one session. However, multiple sessions may be needed for optimal results. The recovery time is short, usually just a few days.

Comparison with Other Methods

Laser treatments generally have higher success rates than other methods for cellulite reduction. For example, creams and lotions only help temporarily and require regular application. Exercise and diet can reduce the appearance of cellulite but do not eliminate it completely.

Non-laser treatments like massage therapy or radiofrequency also show lower success rates compared to laser options. These alternatives might need frequent sessions to maintain results.

Influencing Factors

Several factors influence the success rate of laser treatments:

  • Severity of Cellulite: Mild cases respond better than severe ones.
  • Patient Lifestyle: Healthy habits like balanced diet and exercise improve outcomes.
  • Skin Type: Some skin types react better to laser treatments.
  • Age: Younger patients tend to see quicker and longer-lasting results.

Alternative Cellulite Solutions

Creams and Lotions

Creams and lotions are popular for reducing cellulite. They often contain caffeine or retinol. These ingredients help tighten the skin temporarily. However, they do not remove fat cells. They work by dehydrating the skin, making cellulite less visible.

Effectiveness varies from person to person. Some see minor improvements, while others notice no change. Results are usually temporary and require continuous use.

Endermologie®

Endermologie® is a non-invasive treatment. It uses a machine with rollers and suction to massage the skin. This process aims to break up fibrous bands under the skin.

The treatment can improve blood flow and reduce fluid retention. Many people report smoother skin after several sessions. However, it does not provide permanent results. Maintenance treatments are necessary to keep the effects.

Radiofrequency Therapy

Radiofrequency therapy targets subcutaneous fat with heat energy. The heat stimulates collagen production, which tightens saggy skin and reduces cellulite bumps.

Treatments are typically painless but need multiple sessions for noticeable results. The effects can last several months but are not permanent without maintenance.

Acoustic Wave Therapy

Acoustic wave therapy uses sound waves to break down cellulite indentations. It improves blood flow and boosts collagen production in the treated area.

Patients often see smoother skin after a few sessions. However, like other treatments, results are temporary and require follow-up treatments.

Mesotherapy

Mesotherapy involves injecting substances into the cellulite layer. The injections may include vitamins, minerals, or enzymes like collagenase that break down fat cells.

Results vary widely among patients. Some experience significant improvement, while others see minimal changes. This method also requires multiple sessions for best results.

Realistic Expectations

It is crucial to have realistic expectations when choosing alternative cellulite solutions:

  • Most treatments offer temporary improvements.
  • Continuous use or maintenance sessions are often required.
  • Non-invasive methods cannot remove unwanted fat entirely.
  • Individual results will differ based on various factors.

Early Stage and Advanced Options

Early Stage Treatments

Early-stage cellulite can be managed with simple, non-invasive methods. These treatments focus on prevention and minimal intervention. Regular exercise helps improve blood flow and reduce fat deposits. Maintaining a healthy diet also plays a crucial role.

Topical creams containing caffeine or retinol may improve skin texture. They work by tightening the skin and reducing the appearance of bumps. Massages can help by breaking down fat cells and improving circulation in the affected area.

Advanced Treatment Options

For severe cellulite, advanced treatments are necessary. Laser therapy is one effective option. It uses high energy light to break down tough bands under the skin. This reduces the dimpled appearance significantly.

Subcision (Cellfina™) is another advanced treatment. It involves inserting a needle under the skin to cut fibrous septa bands that cause dimpling. The procedure releases these bands, resulting in smoother skin.

Laser Therapy Details

Laser therapy targets the deeper layers of the skin. The high energy light breaks down fibrous septa that pull down on the skin layer, creating dimples. Multiple sessions may be needed for optimal results.

A multicenter study by Kaminer et al showed significant improvement in cellulite appearance after laser treatments. Adult women who underwent this therapy reported smoother skin for up to a year post-treatment.

Subcision (Cellfina™) Insights

Cellfina™ works by releasing tough septa bands beneath the skin surface. This process smooths out bumps caused by cellulite. The procedure usually requires local anesthesia and takes about an hour.

Results from Cellfina™ can last up to three years, making it a long-term solution for severe cases of cellulite. It’s important to note that this treatment should only be performed by qualified professionals.

Importance of Professional Consultation

Choosing the right treatment depends on cellulite severity and individual needs. Consulting with a healthcare professional ensures you receive appropriate advice and care.

Choosing the Right Treatment

Effectiveness

Different cellulite treatments have varying levels of effectiveness. Laser treatments are known to be effective for many patients. Clinical trials have shown significant improvement in skin appearance after several sessions. However, results can vary based on the severity of cellulite and individual response.

Cost

Laser treatments can be expensive. Costs typically range from $1,500 to $3,000 per session. Multiple sessions are often needed to achieve desired results. It’s important to consider your budget when choosing a treatment plan.

Recovery Time

Recovery time is minimal with laser treatments. Most patients experience mild redness or swelling, which subsides within a few days. Unlike invasive procedures, there is no need for extended downtime.

Potential Side Effects

Laser treatments carry some risks. Common side effects include temporary redness, swelling, and bruising. Some patients may experience more serious adverse events like burns or changes in skin color. Always discuss potential risks with your physician before starting treatment.

Personalized Treatment Plans

A personalized approach is crucial for effective cellulite treatment. Individual health conditions and the severity of cellulite should guide the choice of treatment. For example, people with sensitive skin may not tolerate certain procedures well.

Consult a Specialist

Consulting with a dermatologist or cosmetic surgeon is essential. They can assess your specific needs and recommend the best treatment options. Discussing your goals and medical history helps in creating a tailored plan that maximizes benefits while minimizing risks.

Final Remarks

Laser treatment for cellulite offers a promising solution backed by research and success stories. It’s crucial to weigh your options and choose the right method tailored to your needs. Whether you’re in the early stages or dealing with advanced cellulite, understanding the benefits and limitations of each treatment can make a huge difference.

Ready to take the next step in your cellulite treatment journey? Consult a trusted professional to discuss laser therapy and other alternatives. Your path to smoother skin starts with informed decisions. Don’t wait—take action today!

Frequently Asked Questions

What causes cellulite?

Cellulite forms due to fat deposits pushing through connective tissue beneath the skin. Hormones, genetics, and lifestyle factors contribute.

How does laser treatment reduce cellulite?

Laser treatments target fat cells and stimulate collagen production. This tightens skin and reduces the appearance of cellulite.

Is laser therapy effective for all stages of cellulite?

Yes, laser therapy can treat both early-stage and advanced cellulite. Effectiveness may vary based on individual conditions.

Are there any side effects of laser cellulite treatment?

Common side effects include temporary redness, swelling, or bruising. These usually subside within a few days.

How many sessions are needed for visible results?

Typically, 3-6 sessions are needed for noticeable improvement. The number varies per individual.

Can I combine laser treatment with other cellulite solutions?

Yes, combining treatments like diet, exercise, and topical creams can enhance results. Consult your doctor for personalized advice.

What is the success rate of laser therapy for cellulite?

Laser therapy has a high success rate with many patients seeing significant improvement. However, results can vary based on individual factors.

Lip Reduction Surgery Cost, Insurance, Procedure, and Recovery Guide

Key Takeaways

  • Lip reduction surgery can enhance facial harmony by reducing the size of overly large lips, resulting in a balanced appearance and minimal scarring.
  • The cost of lip reduction surgery varies widely, typically ranging from $1,500 to $4,000, depending on factors like location and surgeon expertise for this surgical procedure on the lips and face aimed at achieving minimal scarring.
  • Insurance often does not cover cosmetic procedures like lip reduction unless deemed medically necessary for facial features and minimal scarring needs.
  • The surgery involves removing excess tissue and reshaping the lips, usually under local anesthesia with minimal downtime, to enhance facial features and contour while maintaining elasticity according to individual needs.
  • Potential risks include swelling, infection, asymmetry, and minimal scarring, but these are generally rare when performed by a qualified surgeon.
  • Financing options such as payment plans or medical loans can help make the procedure more affordable.

What Is Lip Reduction

Definition

Lip reduction is a cosmetic procedure. It aims to reduce the size, texture, and elasticity of one or both lips. This can be for aesthetic or functional reasons. Many people seek this surgery to achieve lips that are more proportionate to their facial features and improve elasticity in order.

Procedure Details

The procedure involves the surgical removal of excess lip tissue in order to reshape the lips. A surgeon will make small incisions inside the mouth. They then remove the extra tissue carefully. The goal is to create a natural and balanced look in order to enhance the lips.

Goals

The primary goal of lip reduction is to achieve a more proportionate lip size in order to balance the lips. This should match the patient’s overall facial structure. It can help enhance facial harmony, including the lips, and boost self-confidence.

Recovery

Recovery from lip reduction surgery typically takes about one to two weeks for the lips. Patients may experience swelling and discomfort initially. Most return to normal activities within a week.

Risks

As with any surgery, lip reduction carries some risks:

  • Infection
  • Scarring
  • Asymmetry

Patients should discuss these risks with their surgeon beforehand.

Understanding Surgery Costs

Factors Influencing Cost

Several factors influence the average cost of lips reduction surgery. The surgeon’s expertise plays a significant role. Experienced surgeons may charge higher fees due to their skill and reputation. Geographic location also impacts costs. Urban areas or regions with a higher cost of living tend to have more expensive medical procedures.

The complexity of the surgery is another factor. More intricate surgeries that require longer operating times can lead to increased costs.

Surgeon Expertise

Surgeons with extensive experience often charge more. Their expertise ensures better outcomes and safety, which justifies the higher price. It is crucial to choose a board-certified surgeon with a proven track record in lips reduction surgeries.

Geographic Location

Where you live affects how much you will pay for lip surgery. In cities like New York or Los Angeles, prices are generally higher compared to smaller towns or rural areas.

Complexity of Surgery

Simple procedures usually cost less than complex ones. If additional corrections or adjustments are needed during the surgery on the lips, it can increase the total cost.

Additional Costs

Besides the primary surgical fee, there are other costs involved:

  • Anesthesia Fees: Anesthesiologists charge separately for their services.
  • Facility Fees: Hospitals or surgical centers may have their own charges.
  • Post-operative Care: Follow-up visits and medications add to the overall expense.

These additional costs can vary widely depending on the facility and region.

Anesthesia Fees

Anesthesia is essential for pain management during surgery. The type of anesthesia used—local or general—impacts its cost. Local anesthesia is usually cheaper but might not be suitable for everyone.

Facility Fees

Surgical centers and hospitals charge fees for using their facilities. These fees cover operating room expenses and other overheads associated with maintaining a sterile environment.

Post-operative Care

After surgery, follow-up appointments ensure proper healing. Medications prescribed for pain relief and infection prevention also contribute to post-operative care costs.

Consulting Multiple Surgeons

It’s wise to consult multiple surgeons before making a decision. This helps in understanding different pricing structures and what each package includes. Some surgeons offer comprehensive packages that cover all aspects of the procedure, while others itemize each service separately.

Insurance and Lip Reduction

Cosmetic vs. Reconstructive

Lip reduction surgery can be either cosmetic or reconstructive. Cosmetic lip reduction is performed to enhance appearance by reducing lip size for aesthetic reasons. This type of surgery usually involves reshaping the lips to achieve a balanced look with minimal scarring. It is not covered by insurance because it is considered elective.

Reconstructive lip reduction addresses medical issues such as congenital defects, trauma, or diseases affecting the lips. These surgeries aim to restore function and appearance. Insurance companies are more likely to cover reconstructive procedures since they are medically necessary.

Insurance Policies

It’s essential to check with your insurance provider about their policies on reconstructive surgeries. Each insurance company has different guidelines and coverage options. Some may require pre-authorization or additional documentation from your healthcare provider.

You should ask specific questions like:

  • Is reconstructive lip reduction covered?
  • What documentation is needed for approval?
  • Are there any out-of-pocket costs?

Having this information helps in planning and reduces unexpected expenses.

Financing Options

For those considering cosmetic lip reduction, it’s important to discuss financing and payment options with the surgeon’s office. Most cosmetic procedures are not covered by insurance, so patients need to explore other ways to manage costs.

Many clinics offer payment plans, allowing you to pay over time rather than upfront. Some also partner with medical financing companies that provide loans specifically for cosmetic procedures.

You might want to:

  • Ask about discounts or special offers.
  • Check if the clinic accepts credit cards.
  • Inquire about any hidden fees or extra charges.

Surgery Procedure Explained

Anesthesia Administration

The procedure begins with anesthesia. The doctor administers local or general anesthesia to ensure the patient feels no pain. Local anesthesia numbs just the lip area. General anesthesia puts the patient to sleep.

Incision Technique

After anesthesia, the surgeon makes an incision along the “wet line”. This is where the inner and outer parts of the lip meet. Making an incision here helps minimize visible scarring.

Tissue Removal

Next, the surgeon removes excess tissue. They carefully excise a strip of tissue from the inside of the lips. This reduces lip volume and reshapes them for a more desired look.

Sutures Placement

Once tissue removal is complete, sutures are placed. The surgeon uses fine stitches to close the incision. These sutures help in healing and reduce scarring.

Duration of Surgery

The surgery usually takes 1-2 hours. It depends on how much reduction is needed and any complications that arise during surgery.

Immediate Post-Operative Period

Post-surgery, patients are monitored for a short period. They might experience swelling and discomfort which is normal. Pain medications are often prescribed to manage this discomfort.

Risks and Side Effects

Common Risks

Lip reduction surgery has several common risks. Infection is a significant concern. Bacteria can enter through the surgical site. This might require antibiotics to treat. Adverse reactions to anesthesia are also possible. Patients may experience nausea or dizziness.

Post-Operative Care

Following post-operative care instructions is crucial. These instructions help minimize complications. Patients should keep the surgical area clean. Avoiding certain activities can reduce the risk of infection. Pain medication might be necessary during recovery.

Swelling and Scars

Swelling is a typical side effect after surgery. It usually decreases over time but can last for weeks. Scarring is another concern. Scars should fade, but some may remain visible. Proper care can help reduce their appearance.

Realistic Expectations

Having realistic expectations is essential for satisfaction with the results. Not all outcomes will meet initial hopes. Sometimes, revision surgery might be needed to achieve desired results.

Emotional Impact

The emotional impact of lip reduction surgery varies. Some patients feel more confident after the procedure. Others may struggle if results don’t match expectations.

Recovery Journey

Initial Days

The first few days after lip reduction surgery are crucial. Patients often experience swelling and discomfort. Rest is essential during this period. Swelling and pain usually peak within the first 48 hours.

Cold compresses can help reduce swelling. Over-the-counter pain medication may also be advised by your surgeon.

First Week

By the end of the first week, some improvement is visible. Swelling starts to decrease. Pain becomes more manageable. It’s important to avoid strenuous activities during this time.

Follow your surgeon’s instructions carefully. This includes keeping the surgical area clean and avoiding certain foods that might irritate the lips.

Returning to Work

Most patients can return to work within a week or two. The exact timeline depends on the nature of their job and how quickly they heal. Jobs that require minimal physical activity are easier to resume sooner.

Visible scars may still be present but will fade over time. Makeup can help cover any remaining redness or bruising.

Long-Term Healing

Complete healing from lip reduction surgery takes several weeks to months. By about six weeks, most of the swelling should subside, revealing more of the final result.

Attending all follow-up appointments is vital for monitoring progress. Your surgeon will check for proper healing and address any concerns you might have.

Managing Pain and Discomfort

Proper care can significantly reduce discomfort during recovery:

  • Use prescribed medications as directed
  • Apply cold compresses regularly
  • Avoid hot foods and drinks initially
  • Keep your head elevated while sleeping to reduce swelling

These steps help ensure a smoother healing process.

Maintaining Results

Long-term results depend on how well you follow post-operative care instructions:

  • Avoid smoking as it impedes healing
  • Stay hydrated and maintain a healthy diet
  • Protect your lips from excessive sun exposure

These habits support optimal healing and long-lasting results.

Ideal Candidates

Good Health

Patients should be in good overall health. This means no serious medical conditions. They should not have any infections or untreated diseases. A healthy body heals faster and reduces risks during surgery.

Realistic Expectations

Candidates must have realistic expectations. Lip reduction surgery offers a more balanced appearance, not perfection. Understanding the limits of the procedure is crucial. Unrealistic goals can lead to disappointment.

Psychological Readiness

Psychological readiness is essential. Patients need to be mentally prepared for permanent changes. Cosmetic surgery can impact self-esteem and confidence. Being emotionally stable helps in coping with these changes.

Personal Desire

The decision should come from the individual, not external pressure. Seeking surgery to please others is not advisable. The desire for a pleasing shape should be personal and well-considered.

Balanced Facial Features

A good candidate aims for harmonious facial features. The goal is a natural appearance that fits their face structure. Overly dramatic changes can look unnatural and may lead to dissatisfaction.

Age Considerations

Age matters when considering lip reduction surgery. Younger patients might still be developing physically and emotionally. Older patients need to ensure they are fit for surgery, considering age-related health factors.

Financing Options

Medical Credit Cards

Medical credit cards offer a popular financing option for lip reduction surgery. These cards are specifically designed for health-related expenses. They often provide introductory periods with low or no interest rates. It is important to read the terms and conditions carefully to avoid unexpected fees.

Personal Loans

Personal loans can help cover the cost of surgery. Many banks and credit unions offer these loans. Interest rates and repayment terms vary by provider. Patients should compare different lenders to find the best deal.

Payment Plans

Many surgeons offer payment plans directly through their offices. These plans allow patients to pay in installments over time. Payment plans can make the procedure more affordable by spreading out the cost. It is crucial to understand all aspects of the plan, including interest rates and fees.

Third-Party Financing Companies

Third-party financing companies specialize in medical procedures. They offer flexible payment solutions tailored to patient needs. Examples include CareCredit and United Medical Credit. These companies may provide longer repayment terms and lower interest rates compared to traditional loans.

Understanding Terms and Conditions

Understanding the terms and conditions of any financing plan is essential. Patients should look at:

  • Interest rates
  • Repayment schedules
  • Hidden fees
  • Penalties for late payments

Reading the fine print helps avoid surprises later on.

Exploring All Options

Exploring all available options ensures finding the best fit for individual circumstances. Patients can consult with financial advisors or healthcare providers for guidance.

Final Remarks

Lip reduction surgery can offer a solution for those seeking a more balanced facial appearance. We’ve covered everything from costs and insurance to the procedure itself, risks, recovery, and financing options. Understanding these aspects helps you make an informed decision.

If you’re considering lip reduction, consult with a qualified surgeon to explore your options. Your journey towards achieving your desired look starts with taking that first step. Don’t hesitate—reach out today to learn more and take control of your beauty goals.

Frequently Asked Questions

What is lip reduction surgery?

Lip reduction surgery is a cosmetic procedure to reduce the size of the lips. It aims to create a more balanced facial appearance.

How much does lip reduction surgery cost?

The cost varies widely depending on the surgeon, location, and complexity. On average, it ranges from $1,500 to $4,000.

Does insurance cover lip reduction surgery?

Typically, insurance does not cover cosmetic procedures like lip reduction. However, if it’s medically necessary, some coverage might be available. Always check with your provider.

What are the risks of lip reduction surgery?

Common risks include swelling, bruising, infection, and asymmetry. Always consult with a qualified surgeon to understand all potential side effects.

How long is the recovery time for lip reduction surgery?

Recovery usually takes about one to two weeks. Swelling and discomfort should subside within this period.

Who is an ideal candidate for lip reduction surgery?

Ideal candidates are those in good health with realistic expectations. They seek to improve their facial balance by reducing lip size.

Are there financing options available for lip reduction surgery?

Yes, many clinics offer financing plans or payment options. Consult your clinic for specific details and terms.

Cosmetic Ear Surgery: Otoplasty Purpose & Ideal Candidates

Key Takeaways

  • Otoplasty Overview: Otoplasty, or ear surgery, is a cosmetic procedure aimed at improving the appearance of the ears, often by pinning them closer to the head or reshaping them through incisions, typically after a consultation.
  • Common Reasons: People opt for otoplasty, a type of cosmetic surgery, to correct protruding ears, asymmetry, or deformities caused by injury or congenital conditions.
  • Ideal Candidates: The best age for otoplasty, a type of cosmetic surgery, is typically between 5 and 7 years old, but adults can also benefit from the procedure involving incisions.
  • Types of Procedures: There are different types of otoplasty, including ear pinning, ear reduction, and reconstructive ear surgery, each involving incisions and tailored to specific needs.
  • Preparation and Recovery: Proper preparation and post-operative care are crucial for a successful outcome. This includes following your surgeon’s instructions and attending follow-up visits.
  • Expected Results: Most patients experience improved ear appearance and increased self-confidence, with results that are generally permanent.

Understanding Otoplasty

Definition

Otoplasty is a type of cosmetic or reconstructive ear surgery. The procedure involves altering the shape, position, or proportion of the ears. Doctors perform otoplasty on children and adults.

Goals

The main goal of otoplasty is to improve the appearance of the ears. This can include changing their shape, adjusting their position, or modifying their size. Many seek this surgery to feel more confident about their looks.

Shape Improvement

Otoplasty can reshape ears that stick out too far from the head. It can also correct abnormalities like large earlobes or folded ear tips. Surgeons use various techniques to achieve these changes.

Position Adjustment

Adjusting the position of the ears is another common goal. Ears that are too prominent can be pinned back closer to the head. This helps create a more balanced look.

Proportion Correction

e people have ears that are not proportional to their heads. Otoplasty can make adjustments so that both ears match in size and position. This creates a more harmonious appearance.

Birth Defects Correction

Many children are born with ear defects such as microtia or anotia. These conditions affect the ear’s shape and function. Otoplasty can help correct these issues early in life.

Injury Repair

Injuries can also cause deformities in the ears. Accidents, burns, or bites may damage ear tissue. Reconstructive otoplasty aims to restore normal appearance and function after such events.

Techniques Used

Surgeons use different techniques based on individual needs:

  • Cartilage scoring: making small cuts in cartilage
  • Cartilage sparing: using stitches to reshape cartilage
  • Skin removal: taking out excess skin for better contour

These methods ensure minimal scarring and natural-looking results.

Recovery Process

Recovery from otoplasty usually takes a few weeks:

  1. Bandages protect the ears initially.
  2. Pain and swelling subside within days.
  3. Stitches come out after about one week.
  4. Normal activities resume within two weeks.

Following post-surgery care instructions is crucial for good results.

Reasons for Otoplasty

Congenital Conditions

e people are born with prominent ears or misshapen ears. These conditions can be due to genetics. For instance, some children have ears that stick out more than usual. This is often noticeable at birth or within the first year of life. The condition can affect one or both ears.

Misshapen ears may also result from cartilage deformities. This includes issues like lop ear, where the tip folds down and forward. Another example is cup ear, which appears unusually small and cupped. Both conditions can lead to self-esteem issues in children.

Traumatic Events

Injuries can also necessitate otoplasty. Accidents involving the ear are common in sports and daily activities. A blow to the ear during a contact sport like football can cause significant damage.

Car accidents may also injure the ear, leading to deformities that require correction. In these cases, otoplasty helps restore both function and appearance. Trauma-induced deformities often need immediate attention to prevent long-term issues.

Aesthetic Concerns

Many seek otoplasty for aesthetic reasons. Dissatisfaction with ear appearance is a primary motivator. Some individuals feel their ears are too large or asymmetrical.

This dissatisfaction often starts in childhood but can persist into adulthood. Bullying or teasing about ear size or shape contributes to this decision. Adults may choose surgery to improve confidence and self-image.

Ideal Age for Surgery

Children First

Children are often the first candidates for ear surgery. Otoplasty is suitable for those with fully developed ears. This typically happens after age 4.

Performing otoplasty on children can prevent psychological distress. Kids with prominent ears may face bullying. They might suffer from low self-esteem. Early surgery helps avoid these issues.

Psychological Benefits

The psychological benefits of early otoplasty are significant. Children who undergo the procedure often feel more confident. They are less likely to be teased by peers.

Improved self-esteem can lead to better social interactions. It also positively affects academic performance. Addressing ear shape early can change a child’s life trajectory.

Adults Too

Adults can also benefit from otoplasty. The effectiveness of the surgery remains high regardless of age.

Many adults seek ear surgery for cosmetic reasons. Some may have missed the opportunity as children. Others might want to correct changes due to aging or injury.

No Age Limit

There is no strict age limit for otoplasty. Both young and older adults can undergo the procedure safely.

However, it’s crucial to have realistic expectations about the results. Consulting with a qualified surgeon ensures proper guidance and care.

Technical Details

Otoplasty involves reshaping the ear cartilage. Surgeons use various techniques based on individual needs.

The procedure usually takes one to two hours. It is performed under local or general anesthesia, depending on patient preference and age.

Post-surgery recovery includes wearing bandages around the head for support and protection. Most patients return to normal activities within a week.

Types of Otoplasty

Ear Pinning

Ear pinning, also known as pinnaplasty, is a common type of otoplasty. This procedure aims to correct ears that stick out too far from the head. Surgeons perform ear pinning by making an incision behind the ear. They then reshape or remove cartilage to bring the ears closer to the head. The surgery usually takes about one to two hours and is often done under local anesthesia.

Ear Reduction

Ear reduction surgery targets oversized ears. This type of otoplasty reduces the size of large ears, creating a more balanced appearance. Surgeons make incisions in the ear’s natural folds to minimize visible scarring. They remove excess skin and cartilage to achieve the desired size. This procedure can take around two hours and may require general anesthesia for comfort.

Ear Augmentation

Ear augmentation focuses on underdeveloped or missing parts of the ear. It is ideal for individuals with congenital deformities or those who have suffered trauma. Surgeons use either synthetic implants or cartilage grafts from other body parts to build up the ear structure. The goal is to create a more natural and symmetrical look.

Preparing for Surgery

Qualified Surgeon

Finding a qualified surgeon is crucial. Look for a doctor who has experience in otoplasty. Check their credentials and ensure they are board-certified. A surgeon with many years of experience will likely have better outcomes.

Ask for before-and-after photos of previous patients. This helps you understand the surgeon’s skill level. A good surgeon will also have positive reviews from past patients.

Medical Evaluation

Before ear surgery, undergo a thorough medical evaluation. Your doctor will review your medical history. This helps identify any potential risks.

You may need to stop certain medications before the procedure. Medication like aspirin can increase bleeding risk. Inform your doctor about all medicines you are taking.

A physical exam ensures you are healthy enough for surgery. Blood tests might be required to check for underlying conditions.

Discussing Expectations

Discuss your expectations with the surgeon. Be clear about what you hope to achieve through cosmetic ear surgery. Realistic goals are important for satisfaction.

The surgeon will explain what is possible and what is not. They will outline the potential outcomes and risks involved in the process.

Understanding these factors helps set realistic expectations. It reduces disappointment post-surgery.

General Anesthesia

Most otoplasty procedures use general anesthesia. You will be asleep during the surgery, which takes about 2-3 hours on average.

An anesthesiologist monitors you throughout the process to ensure safety. They manage pain and sedation levels effectively.

After waking up, you might feel groggy or disoriented at first but this is normal and temporary.

Post-Surgery Care

Post-surgery care is vital for recovery. You will likely wear a headband around your ears to protect them while they heal.

Follow all post-operative instructions given by your doctor carefully:

  • Keep the surgical area clean.
  • Avoid strenuous activities.
  • Take prescribed pain medication as directed.
  • Attend follow-up appointments to monitor healing progress.

These steps help minimize complications and promote quicker recovery.

Surgery Process

Consultation

Every otoplasty begins with a consultation. The surgeon examines the ears. They discuss the patient’s goals. They also review medical history. This helps plan the surgery.

Anesthesia

The procedure starts with anesthesia. It ensures comfort during surgery. Local anesthesia numbs the area. General anesthesia is used for longer surgeries.

Incisions

Surgeons make incisions behind the ear. This hides scars well. The type of incision varies by procedure. They might cut along natural folds or creases.

Cartilage Reshaping

Cartilage reshaping is crucial in otoplasty. Surgeons remove or reshape cartilage to achieve desired results. They may fold, trim, or reposition it.

Skin Adjustment

After reshaping cartilage, they adjust the skin over it. Excess skin is removed if needed. This ensures a smooth appearance.

Stitches

Stitches close the incisions and secure new shapes. Surgeons use dissolvable stitches or those that need removal later.

Recovery Instructions

Following pre-surgery instructions is vital for recovery. Patients should avoid certain medications before surgery. Following doctor’s advice ensures a smooth operation.

Recovery and Care

Initial Rest

After ear surgery, patients need rest. The first few days are crucial. Most people stay home for at least a week. This time allows the body to start healing.

Children often need extra care during this period. They may feel discomfort or pain. Keeping them calm and relaxed helps in their recovery.

Managing Pain

Pain is common after surgery. Doctors usually prescribe medication for relief. Take these medicines as directed. Over-the-counter pain relievers can also help.

Applying cold packs to the area reduces swelling. Do this for short periods throughout the day.

Follow-Up Visits

Follow-up visits with the surgeon are important. These appointments check the progress of healing. The first visit usually happens a week after surgery.

During these visits, surgeons remove stitches if necessary. They also ensure there are no signs of infection or complications.

Returning to Activities

Most people return to normal activities within two weeks. Children might take longer depending on their age and activity level.

Avoid strenuous activities like sports for at least a month. Protecting the ears from injury during this time is vital.

Possible Complications

Complications can occur after ear surgery. Recognizing early signs prevents serious issues:

  • Infection: Redness, swelling, or pus around the surgical site.
  • Bleeding: Excessive bleeding that does not stop.
  • Pain: Severe pain not relieved by medication.
  • Fever: A high fever indicating an infection.

If any of these symptoms appear, contact your doctor immediately.

Emotional Support

Recovery isn’t just physical; it’s emotional too. Some people feel self-conscious about their appearance during healing.

Support from family and friends helps boost confidence. Encouraging words make a big difference in someone’s recovery journey.

Expected Outcomes

Improved Appearance

Otoplasty can significantly improve ear appearance. This surgery can correct protruding ears, reshape irregular ear structures, and create a more balanced look. Patients often see a noticeable change in symmetry after the procedure. The goal is to make the ears look natural and proportional to the head.

Boosted Confidence

A successful ear surgery can boost self-esteem. Children and adults who feel self-conscious about their ears may gain confidence post-surgery. This improvement in self-image can positively impact social interactions and overall quality of life.

Permanent Results

The results of otoplasty are generally permanent. Once healed, the new ear shape usually stays stable over time. However, it’s important to note that natural aging processes may still affect the ears. Skin elasticity and cartilage structure could change as one ages.

Potential Risks

As with any surgery, otoplasty comes with risks. Common risks include infection, bleeding, and scarring. Less common but serious complications might involve changes in skin sensation or asymmetry issues if healing doesn’t go as planned.

Costs Involved

The cost of ear surgery varies widely. Factors influencing costs include the surgeon’s experience, clinic location, and complexity of the procedure. On average, cosmetic ear surgeries can range from $3,000 to $5,000 in the United States.

Types of Procedures

There are different types of otoplasty procedures depending on individual needs:

  • Traditional otoplasty for reshaping large or protruding ears.
  • Ear pinning to bring ears closer to the head.
  • Ear reduction for reducing overly large ears.

Each type aims at achieving a natural-looking result tailored to patient-specific conditions.

Post-Surgery Care

Following surgery, patients need proper care to ensure good healing and optimal results. Avoiding activities that put pressure on the ears is crucial during recovery. Wearing a headband at night helps maintain the new ear position while sleeping.

Final Remarks

Otoplasty can be a life-changing decision, offering both physical and emotional benefits. Understanding the process, from reasons to recovery, ensures you’re well-prepared and confident in your choice. The surgery is safe and effective, providing a boost in self-esteem and overall appearance.

Ready to take the next step? Consult with a certified surgeon to discuss your options. Your journey to enhanced confidence starts now. Don’t wait—embrace the new you today!

Frequently Asked Questions

What is otoplasty?

Otoplasty is a cosmetic ear surgery to improve the shape, position, or proportion of the ears. It helps to correct deformities and enhance appearance.

Who should consider otoplasty?

Anyone unhappy with their ear shape or position can consider otoplasty. It’s ideal for those with prominent ears, congenital defects, or ear injuries.

At what age can someone undergo otoplasty?

Children as young as 5-6 years old can have otoplasty. This is when ears are nearly fully developed. Adults of any age can also benefit from the procedure.

What types of otoplasty are available?

There are various types including traditional otoplasty, incisionless otoplasty, and reconstructive ear surgery. Each type addresses specific concerns and goals.

How should I prepare for an otoplasty procedure?

Follow your surgeon’s instructions closely. This may include avoiding certain medications, stopping smoking, and arranging for post-surgery care at home.

What does the recovery process involve?

Recovery usually takes about one week. You’ll need to wear a headband to support healing and avoid strenuous activities. Follow-up appointments ensure proper recovery.

What outcomes can I expect from otoplasty?

You can expect improved ear symmetry and a natural look that boosts confidence. Results are typically long-lasting if post-surgery care guidelines are followed.

How Much Does Laser Tattoo Removal Cost? A Detailed Breakdown

Key Takeaways

  • Laser Tattoo Removal Costs Vary: Prices depend on multiple factors such as tattoo size, color, and skin type.
  • Factors to Consider: The number of sessions needed, the complexity of the tattoo, and the clinic’s location all influence the total cost.
  • Size Matters: Larger tattoos generally cost more to remove, with prices often broken down by square inches.
  • Step-by-Step Pricing: Clinics usually provide a detailed pricing process, starting with a consultation and ending with a per-session fee.
  • Flexible Payment Options: Many clinics offer payment plans or financing to make the process more affordable.
  • Safety and Pain: While laser removal is generally safe, it can be painful; understanding these aspects helps in making an informed decision.

Understanding Laser Tattoo Removal Costs

Provider and Location

Laser tattoo removal prices vary by provider. Clinics in large cities often charge more. Smaller towns may offer lower rates. The experience of the technician also matters. More experienced providers might charge higher fees.

Geographic location affects pricing too. Coastal areas tend to have higher costs. Midwestern states often have lower prices.

Technology Used

Different lasers affect the cost. Some clinics use older technology which might be cheaper. Newer lasers like PicoSure can be more expensive but are more effective.

Advanced laser technology can reduce the number of sessions needed. This might save money in the long run despite a higher per-session price.

Tattoo Size and Complexity

Tattoo size plays a big role in pricing. Larger tattoos require more time to remove. This increases the overall cost.

Complex designs with multiple colors also cost more to remove. Each color might need a different laser wavelength, increasing session length and price.

Number of Sessions

Tattoo removal requires multiple sessions. The number depends on factors like tattoo age, ink type, and skin type.

Older tattoos generally fade faster and need fewer sessions. Newer tattoos with fresh ink take longer to remove.

Overall Cost vs Per-Session Price

It’s important to consider the total cost of complete removal, not just per-session prices. A lower per-session rate might seem appealing at first glance but could end up being more expensive if many sessions are needed.

e clinics offer package deals for multiple sessions, which can lead to long-term savings.

Package Deals vs Individual Sessions

Package deals often provide better value than paying for individual sessions. These packages usually include a set number of sessions at a discounted rate.

Paying for each session separately can add up quickly, especially if many are needed for complete removal.

Factors Influencing Removal Price

Tattoo Size

Larger tattoos require more sessions to remove. Each session targets a specific area of the tattoo. Small tattoos may need fewer sessions, making them less expensive.

A full sleeve or back piece can significantly increase the total cost. The size directly impacts the number of appointments needed.

Color Complexity

Different ink colors respond differently to laser treatments. Black ink is generally easier to remove. Colors like green and blue are more challenging.

Multicolored tattoos need specialized lasers for each color. This increases the number of sessions required and thus the overall cost.

Ink Depth

The depth of the ink in your skin affects removal time. Tattoos with deeper ink take longer to break down.

Shallow tattoos may be removed faster and might cost less. Professional tattoos often have deeper ink compared to amateur ones.

Skin Type

Skin type plays a role in how effective laser removal is. Darker skin tones absorb more laser energy, which can lead to complications.

Fair-skinned individuals may see quicker results with fewer sessions. Skin type can influence both the number of sessions and the price.

Tattoo Placement

The location of your tattoo affects its removal process. Areas with thinner skin, like wrists or ankles, are more sensitive.

Tattoos on thicker skin areas like the back or thighs may need more sessions. Placement impacts both comfort during removal and overall costs.

Age of Tattoo

Older tattoos tend to fade over time naturally. This makes them easier to remove than newer ones.

Newer tattoos have fresher ink that is harder to break down. Older tattoos might require fewer sessions, reducing the total cost.

Tattoo Size and Cost Breakdown

Small Tattoos

Small tattoos are usually cheaper to remove. They often measure less than 2 inches. The cost ranges from $150 to $300 per session. These tattoos typically need fewer sessions. This makes them more affordable.

Medium Tattoos

Medium-sized tattoos measure between 2 to 4 inches. Removing them can cost between $200 to $500 per session. They generally require more sessions than small tattoos. This increases the overall cost.

Large Tattoos

Large tattoos cover areas bigger than 4 inches. Sessions for these tattoos can range from $400 to $1,000 each. They need many sessions due to their size and detail. This leads to higher costs.

Monthly Payment Options

Removery offers monthly payment plans for tattoo removal. These plans help manage the high costs of large tattoos.

  • Small Tattoos: Payments start at around $50 per month.
  • Medium Tattoos: Monthly payments range from $75 to $150.
  • Large Tattoos: Plans can go up to $250 or more per month.

Choosing a plan that fits your budget is important.

Cost-Effectiveness of Payment Plans

Monthly payment plans can be cost-effective. They spread out the expense over time. This makes it easier to afford expensive removals.

For example, removing a large tattoo might seem costly upfront. But with a monthly plan, you pay smaller amounts over several months.

Pricing Process in Steps

Tattoo Measurement

The first step at Removery involves measuring the tattoo. Experts use precise tools to determine the exact size. This measurement helps in estimating the cost accurately. Larger tattoos generally require more sessions, increasing the price.

Estimating Treatments

After measuring, the number of treatments is estimated. The depth and color of the ink play a crucial role. Black ink is usually easier to remove than colored ink. The average number of treatments ranges from 6 to 12 sessions. Each session fades the tattoo gradually.

Payment Options

Customers are then guided through payment options. They can choose between paying per session or opting for a package plan. Packages often offer discounts, making them a good choice for larger tattoos needing multiple sessions.

Personalized Consultation

A personalized consultation follows these steps. Specialists discuss individual needs and expectations. They explain the process clearly and answer any questions. This helps customers make informed decisions about their treatment plan.

Payment Options for Affordability

Variety of Options

Removery offers a variety of payment options to make tattoo removal more affordable. Clients can choose to pay the full amount upfront. This option often comes with discounts, making it a cost-effective choice.

Another option is financing. Financing allows spreading the cost over several months. It helps manage the expense without paying a large sum at once.

Pay-As-You-Go Sessions

For those who prefer flexibility, Removery offers pay-as-you-go sessions. This option is ideal for clients who cannot commit to a package. Each session is paid for individually, allowing for better budget management.

Pay-as-you-go sessions also benefit those unsure about the number of treatments needed. They can stop anytime without financial commitments.

Small Deposit and Monthly Payments

Making tattoo removal accessible is important to Removery’s team. One way they achieve this is through small deposits and regular monthly payments. Clients start with a small deposit, reducing the initial financial burden.

Monthly payments follow, making it easier to handle costs over time. This method ensures that more people can afford tattoo removal services.

Use of Credit Cards

Removery accepts credit cards as a payment method. This provides an additional layer of flexibility for clients. Using credit cards allows for immediate treatment while deferring payment until later.

Many credit cards offer reward points or cashback on purchases, adding extra benefits for clients using this option.

Spa Partnerships

e spas partner with Removery to offer tattoo removal services. These partnerships may include special deals or discounts for spa members. Clients already visiting these spas can take advantage of convenient locations and possible savings.

Special Cases in Tattoo Removal

Resistant Ink Colors

Removing tattoos with resistant ink colors can be challenging. Colors such as green, blue, and yellow are harder to break down. Laser treatments for these inks often require more sessions. Each session adds to the overall cost.

Specialized lasers may be needed. These lasers target specific wavelengths of light. The process becomes more complex and expensive.

Sensitive Areas

Tattoos on sensitive areas like the face or neck need careful handling. Tattoo removal in these regions can be painful and requires a skilled technician. Extra care means higher costs.

Sensitive skin is prone to complications. More follow-up visits might be necessary, increasing the total price.

Eyebrow Tattoo Removal

Eyebrow tattoo removal is unique. It falls under permanent makeup removal services. The procedure is delicate because it involves facial features.

Prices for eyebrow tattoo removal differ from regular tattoos. Clinics usually charge more due to the precision required. The proximity to eyes also demands extra caution, raising costs further.

Custom-Sized Tattoos

Not all tattoos fit standard size categories. Custom-sized tattoos need individual assessments for pricing.

Clinics evaluate custom tattoos based on several factors:

  • Size
  • Color complexity
  • Location on the body

Custom-sized tattoos often cost more due to their unique nature. They may require specialized equipment and longer treatment times.

Medical Spa Services

e people opt for tattoo removal at a medical spa instead of a clinic. Medical spas offer additional services that may affect pricing.

These spas provide a comfortable environment but at a premium price. They might include skin care treatments post-removal, adding value but also cost.

Safety and Pain Considerations

Choosing a Provider

Selecting the right provider is crucial. Patients should prioritize safety and effectiveness when considering laser tattoo removal. A reputable provider can minimize risks and complications. Verify their certifications and experience. Reviews from previous patients can also provide valuable insights.

Safety Measures

Providers follow strict safety protocols. They use protective eyewear to shield eyes from the laser. The treated area is sanitized before the procedure begins. Different skin types may require specific laser settings to prevent burns or scars.

Pain Management

Pain levels vary among patients. Many describe it as similar to getting a tattoo but quicker. Providers offer numbing creams or local anesthetics to reduce discomfort. Cooling devices are often used during the process to soothe the skin.

Expertise Matters

The expertise of the provider greatly influences the outcome. Experienced professionals understand how different colors react to lasers. Darker colors like black absorb more laser energy, making them easier to remove than lighter colors such as yellow or green.

Real-Life Examples

Consider Sarah, who chose an inexperienced provider for her first session. She experienced significant pain and blistering. Later, she switched to a certified professional who used advanced pain management techniques, resulting in a smoother experience with less discomfort.

Duration and Influencing Factors

Tattoo Size

The size of the tattoo greatly affects the removal process. Larger tattoos require more sessions. For example, a small tattoo might take 3-5 sessions, while a large one could need 10 or more. Each session typically lasts 15-30 minutes.

Ink Type

Different inks respond differently to laser treatment. Black ink is easiest to remove. Colors like green and blue are harder to eliminate. Older tattoos often fade faster than newer ones due to ink degradation over time.

Individual Healing Rates

Healing rates vary between people. Some heal quickly, allowing for shorter intervals between sessions. Others may need longer breaks for their skin to recover fully. Proper aftercare speeds up healing and reduces the number of required sessions.

Typical Session Range

Complete removal usually requires multiple sessions. Most people need between 5-10 sessions for full removal. The exact number depends on factors like ink depth and skin type.

Aftercare Importance

Following aftercare instructions is crucial for optimal healing. Keeping the treated area clean prevents infections. Avoiding sun exposure minimizes skin damage and promotes faster recovery.

Getting Your Price Estimate

Free Consultation

A free consultation is the first step. Contact a clinic and schedule an appointment. During this visit, you can discuss your tattoo removal needs.

Prepare to share details about your tattoo. Information like size, colors used, and location on your body are important. This helps the professional give an accurate estimate.

Quality of Work

The quality of work matters. High-quality laser machines might cost more but provide better results. Ask about the equipment used during your consultation.

Check if the staff has experience with tattoo removal. Experienced professionals usually offer better outcomes and safer procedures.

Questions to Ask

Ask specific questions during your consultation:

  • What type of laser will be used?
  • How many sessions are needed?
  • Are there any additional costs?

These questions help you understand the total amount you might need to pay.

Factors Affecting Price

Several factors influence the price estimate:

  • Size: Larger tattoos generally cost more.
  • Color: Multi-colored tattoos might require different lasers.
  • Location: Tattoos in certain areas may be harder to remove.

Discuss these factors with the professional to get a clear picture of the pricing.

Comparing Prices

Compare prices from different clinics. Don’t just look at the total amount; consider what each package includes. Some clinics might offer deals or discounts for multiple sessions.

Make sure you compare quality and experience along with price. The cheapest option isn’t always the best choice.

Evaluating Value

Consider all factors when evaluating price estimates. Look at the quality of work, equipment used, and staff experience. This ensures you get the best value for your money.

Final Remarks

Understanding the costs and factors of laser tattoo removal is crucial. You now have insights into what affects pricing, from tattoo size to special cases. Knowing the steps and payment options helps you plan better. Safety, pain considerations, and duration are also covered, ensuring you’re well-prepared.

Ready to take the next step? Get your price estimate today. Reach out to a trusted provider and start your journey to clear skin. Don’t wait—your fresh start is just an appointment away!

Frequently Asked Questions

How much does laser tattoo removal typically cost?

Laser tattoo removal costs vary. On average, sessions range from $200 to $500. Prices depend on factors like tattoo size and color.

What factors influence the price of laser tattoo removal?

Key factors include tattoo size, ink colors, location on the body, and number of sessions needed. Larger and multi-colored tattoos generally cost more.

Is laser tattoo removal painful?

Pain levels vary per person. Most describe it as similar to a rubber band snap against the skin. Numbing creams can help reduce discomfort.

How many sessions are required for complete removal?

Typically, 6 to 12 sessions are needed. The exact number depends on tattoo size, ink type, and individual skin response.

Are there financing options available for laser tattoo removal?

Yes, many clinics offer payment plans or financing options to make treatments more affordable. Check with your provider for specific details.

Can all tattoos be completely removed with lasers?

Most tattoos can be significantly faded or fully removed. However, some colors like green and blue may require more sessions or might not fade completely.

What should I do to get an accurate price estimate?

Consult with a certified specialist. They will assess your tattoo’s specifics and provide a detailed cost estimate based on your needs.

Labiaplasty: Costs, Risks, and Recovery Explained

Key Takeaways

  • Evaluate Your Needs: Before considering labiaplasty, reflect on your personal reasons and consult with a medical professional to understand if the procedure is right for you.
  • Budget Wisely: Be aware of the costs associated with labiaplasty, as it is usually not covered by the NHS. Plan your finances accordingly.
  • Choose Wisely: Select a qualified and experienced surgeon who specializes in labiaplasty to ensure the best outcomes and minimize risks.
  • Know the Process: Familiarize yourself with the procedure, including anesthesia options, to make informed decisions and alleviate any concerns.
  • Prepare for Recovery: Understand the recovery journey and follow post-surgery care instructions diligently to promote healing and reduce complications.
  • Stay Informed: Be aware of potential side effects and complications, and maintain open communication with your healthcare provider for a smooth recovery.

Considering Labiaplasty

Personal Reasons

Many women consider labiaplasty for various reasons. Some seek it due to physical discomfort. Others aim to change the appearance of their genitalia. Physical discomfort can result from activities like cycling or wearing tight clothing. This discomfort often comes from enlarged or asymmetrical labial tissue.

Cosmetic desires are another reason. Some women feel self-conscious about the size or shape of their labia. They might want a more symmetrical look, often referred to as a “designer vagina.” It’s essential to distinguish between these motivations before deciding on surgery.

Normal Variations

Understanding the normal variations in labia appearance is crucial. Labia come in many shapes, sizes, and colors. There is no single “ideal” look for female genitalia. The outer labia and inner labia can vary greatly among individuals.

Studies show that most women have some asymmetry in their labial tissue. Knowing this can help manage expectations regarding outcomes. Many surgeons emphasize that the goal should be comfort and confidence rather than achieving a specific look.

Non-Surgical Alternatives

Before opting for surgery, consider non-surgical alternatives. Consulting with a healthcare provider can offer insights into less invasive options. For example:

  • Using lubricants or moisturizers
  • Wearing looser clothing
  • Avoiding activities that cause irritation

These measures can sometimes alleviate physical discomfort without needing surgery.

Psychological Impacts

The decision to undergo genital surgery isn’t only physical; it has psychological aspects too. Counseling can provide support and help explore underlying issues related to body image and self-esteem.

Therapy sessions may uncover if the desire for surgery stems from societal pressures or personal insecurities. Addressing these concerns through counseling might reduce the need for surgical intervention.

Surgical Details

If you decide on labiaplasty, understanding the procedure is vital. The surgery usually involves reducing the size of the inner labia or reshaping them for symmetry. Some procedures also include clitoral hood reduction to enhance aesthetic results.

Recovery time varies but typically lasts a few weeks. Post-surgery care includes avoiding strenuous activities and following your surgeon’s advice closely.

Labiaplasty Costs

Financial Commitment

Prepare for the financial commitment. Labiaplasty costs in the UK average around £4,000. This does not include consultation or follow-up fees. These additional costs can range from £100 to £200 per session.

Financing Options

Explore financing options to manage expenses. Some clinics offer payment plans. This allows spreading out the cost over several months. Credit cards and personal loans are also options.

Insurance Coverage

Insurance coverage may be available in some cases. If labiaplasty is deemed medically necessary, insurance might cover part of the cost. Check with your insurance provider for details.

Additional Costs

Investigate additional costs that may arise. Complications can lead to extra expenses. Revision surgery might be needed if results are unsatisfactory.

Hidden Fees

Be aware of hidden fees. Anesthesia and facility fees can add up quickly. Always ask for a detailed breakdown of costs before proceeding.

NHS and Labiaplasty

Limited Availability

Labiaplasty availability on the NHS is limited. The NHS usually reserves it for cases involving abnormalities or significant distress. This includes congenital conditions affecting the labium minus or severe asymmetry causing pain.

Criteria for Coverage

The criteria for NHS coverage are strict. Patients must show medical necessity, not just cosmetic reasons. They need to prove that the condition affects their daily life or causes physical pain.

Common criteria include:

  • Physical discomfort during activities
  • Pain during sexual intercourse
  • Recurrent infections due to excess tissue

Eligibility Process

The eligibility process involves several steps. First, a general practitioner (GP) assesses the patient’s condition. If deemed necessary, they refer the patient to a specialist.

Steps include:

  1. Initial consultation with GP
  2. Specialist referral if needed
  3. Detailed evaluation by a specialist

The specialist will determine if surgery is medically necessary.

Community Health Resources

Community health resources can offer alternative assistance. Support groups provide emotional support and practical advice. These groups often consist of women who have undergone similar procedures.

Local clinics may also offer guidance on non-surgical options for managing symptoms.

Support Groups

Support groups help young women cope with body image issues related to vaginal lips or vulvas. They offer a safe space to discuss concerns and share experiences.

Women can find these groups through:

  • Local hospitals
  • Online forums
  • Community centers

Selecting a Surgeon

Verify Credentials

Ensure the surgeon is registered with the General Medical Council (GMC). They should have a license to practice. This guarantees they meet professional standards.

Check their qualifications in plastic surgery. Look for specialized training in cosmetic surgery.

Professional Associations

Membership in reputable associations is crucial. British Association of Plastic, Reconstructive and Aesthetic Surgeons (BAPRAS) is one such association. Another is the British Association of Aesthetic Plastic Surgeons (BAAPS).

These memberships indicate adherence to high standards. It shows commitment to ongoing education and ethical practices.

Schedule Consultations

Consult multiple surgeons before deciding. Discuss their experience with labiaplasty. Ask about their approach to patient care.

View before-and-after photos of previous patients. This helps gauge their skill level and aesthetic sense.

Experience and Specialization

Choose a surgeon with extensive experience in labiaplasty. Specialized surgeons are more likely to deliver satisfactory results.

Ask how many procedures they perform annually. More surgeries often mean better expertise.

Patient Reviews

Read reviews from previous patients. Look for feedback on their satisfaction with the results and overall experience.

Patient testimonials provide insight into the surgeon’s reputation and reliability.

Surgical Approach

Understand the surgical techniques used by potential surgeons. The trim method is common but not the only option.

Discuss different approaches and what might be best for your needs. Ensure you are comfortable with their methods.

Understanding the Procedure

Techniques

Labiaplasty involves different techniques. Surgeons can use a scalpel or laser to remove and reshape tissue. The choice of tool depends on the surgeon’s expertise and the patient’s needs. Both methods aim to achieve precise results.

Anatomy

Understanding anatomy is crucial for labiaplasty. The procedure focuses on the labia minora, which are the inner folds of skin around the vaginal opening. Surgeons carefully remove excess tissue while preserving sensitivity and function.

Operation

The operation usually takes one to two hours. It can be done under local or general anesthesia. Patients often go home the same day. Recovery time varies but typically lasts a few weeks.

Goals

The main goal is to achieve a natural appearance. Surgeons also address functional concerns like discomfort during intercourse or exercise. A successful labiaplasty improves both aesthetics and comfort.

Outcomes

Discuss potential outcomes with your surgeon before the procedure. Realistic expectations are essential for satisfaction. Some patients may experience swelling and bruising initially, but these effects subside over time.

Limitations

Labiaplasty has limitations like any surgical procedure. Not everyone will achieve perfect symmetry or complete relief from discomfort. Your surgeon will provide detailed information about what to expect.

Anesthesia Choices

General Anesthesia

General anesthesia puts you completely to sleep. This means you won’t feel any pain during the surgery. It is often chosen for longer or more complex procedures. However, it comes with some risks.

Pros:

  • You remain unconscious and unaware.
  • No memory of the procedure.

Cons:

  • Longer recovery time.
  • Higher risk of complications like nausea or sore throat.

Local Anesthesia

Local anesthesia numbs a specific area of your body. For labiaplasty, this usually involves an injection in the genital area. Sometimes, local anesthesia is combined with sedation to help you relax.

Pros:

  • Shorter recovery time.
  • Fewer side effects compared to general anesthesia.

Cons:

  • You might be awake during the procedure.
  • Some discomfort from the injection site.

Recovery Time

The type of anesthesia affects how quickly you recover. With general anesthesia, expect a longer recovery period. This includes feeling groggy and tired for several hours after waking up.

Local anesthesia allows for quicker recovery. You can go home sooner and resume normal activities faster. Patients often find this option more convenient, especially if they have busy schedules.

Pain Management

Post-operative pain management is crucial for a smooth recovery. General anesthesia may require stronger pain medications afterward due to its invasive nature. These medications can have side effects like drowsiness or constipation.

Local anesthesia usually results in less post-operative pain. Over-the-counter pain relievers are often sufficient for managing discomfort. This makes it easier to return to daily routines without heavy medication.

Consulting an Anesthesiologist

It’s essential to talk to an anesthesiologist before deciding on the type of anesthesia. They will review your health history and discuss any concerns you have about the procedure.

Factors that play a role include:

  • Health conditions: Some medical issues may make general anesthesia risky.
  • Procedure specifics: The complexity and duration of your labiaplasty can influence the best choice.
  • Personal comfort: Your comfort level with being awake versus asleep during surgery matters too.

Recovery Journey

Initial Rest Period

Rest is crucial after labiaplasty. Most women need to rest for the first 48 hours. During this time, avoid physical activities. Use cold packs to reduce swelling. Keep the area clean and dry.

Pain and discomfort are common in the initial days. Pain medication prescribed by the doctor helps manage this. Follow the doctor’s instructions carefully.

Gradual Return to Activities

After the initial rest period, gradually return to daily activities. Light walking is encouraged after a few days. Avoid strenuous activities like heavy lifting or intense exercise for at least four weeks.

Returning to work depends on individual recovery rates. Some people might resume work within a week. Others may take longer based on their comfort level.

Post-Operative Care Requirements

Proper wound care is essential for healing. Clean the area gently with mild soap and water. Pat dry with a soft towel. Avoid using harsh chemicals or scented products.

Attend all follow-up visits scheduled by your surgeon. These visits help monitor healing and address any concerns early on.

Recognizing Signs of Complications

Being aware of potential complications is important during recovery. Look out for signs such as:

  • Excessive bleeding
  • Severe pain unrelieved by medication
  • Unusual discharge or foul odor from the wound
  • Fever or chills indicating infection

If any of these symptoms occur, seek medical advice promptly.

Emotional Experience

Recovery involves not just physical but also emotional aspects. Some women feel anxious about their appearance post-surgery. It’s normal to experience mixed emotions during this period.

Talking to friends, family, or support groups can be helpful. Sharing experiences with others who have undergone labiaplasty provides reassurance and support.

Side Effects and Complications

Common Side Effects

After labiaplasty, women often experience swelling, bruising, and discomfort. These side effects are typical and usually subside within a few weeks. Swelling might last longer but generally decreases significantly after the first week. Bruising also fades over time.

Discomfort can vary in intensity. Over-the-counter pain relievers often help manage it. Cold compresses may reduce swelling and bruising.

Potential Risks

Labiaplasty carries risks like any surgical procedure. Infection is a concern that needs careful attention. Surgeons prescribe antibiotics to prevent infections. Following post-operative care instructions reduces this risk.

Scarring is another potential issue. While scars are usually minimal, improper healing can lead to noticeable scars. Changes in sensation can occur as well, sometimes resulting in numbness or increased sensitivity.

Managing Complications

Discuss with your surgeon how complications will be managed if they arise. Knowing what steps to take helps reduce anxiety. Revision surgery might be necessary in some cases to correct problems or achieve desired results.

Contraindications

Certain conditions make labiaplasty inadvisable. For instance, active infections or untreated medical issues pose risks. Women should disclose their complete medical history to their surgeon to avoid complications.

Emotional Concerns

Undergoing labiaplasty can bring emotional challenges too. Some women may feel anxious about the results or concerned about complications. Open communication with the surgeon can ease these concerns.

Post-Surgery Care

Immediate Care

Patients need to follow specific instructions from their surgeon. This helps ensure optimal healing. Keep the surgical area clean and dry. Use prescribed medications as directed. Avoid applying any lotions or ointments unless advised.

Rest is crucial in the first few days post-surgery. Patients should avoid strenuous activities. Elevate the pelvis when lying down to reduce swelling.

Clothing Adjustments

Wear loose clothing during recovery. Tight garments can irritate the surgical site. Opt for soft, breathable fabrics like cotton.

Avoid wearing tight underwear or pants. This minimizes friction and promotes comfort.

Activity Restrictions

Refrain from heavy lifting and vigorous exercise for at least four weeks. These activities can strain the tissue and delay healing.

Sexual activity should be avoided until cleared by your surgeon. Typically, this means waiting six to eight weeks.

Monitoring Healing

Attend all scheduled follow-up appointments. The surgeon will monitor your progress and address any concerns. Look out for signs of infection such as redness, swelling, or unusual discharge.

Report any symptoms of wound dehiscence immediately. This condition occurs when the surgical wound reopens and needs prompt medical attention.

Pain Management

Pain is common after labiaplasty surgery. Take prescribed pain medications as directed by your doctor. Over-the-counter pain relievers may also be recommended.

Apply cold packs to reduce swelling and discomfort during the initial days post-surgery.

Proper Hygiene

Keep the area clean but avoid soaking in baths or swimming pools until fully healed. Pat the area dry gently after cleaning instead of rubbing it with a towel.

Use mild soap and water for cleaning purposes. Avoid using harsh chemicals that could irritate the sensitive tissue.

Emotional Support

Undergoing labiaplasty can be emotionally challenging for some patients. Talk to a trusted friend or family member about your feelings if needed.

Consider joining support groups where you can share experiences with others who have undergone similar procedures.

Closing Thoughts

Labiaplasty is a personal choice that requires careful consideration. You’ve explored the costs, procedure details, and recovery journey. Selecting a skilled surgeon and understanding anesthesia options are crucial steps. Post-surgery care and being aware of potential side effects ensure a smoother recovery.

If you’re contemplating labiaplasty, take your time to weigh the information. Consult with professionals and make informed decisions for your health and well-being. Ready to take the next step? Reach out to a trusted surgeon today!

Frequently Asked Questions

What is labiaplasty?

Labiaplasty is a surgical procedure to reduce the size of the labia minora. It aims to alleviate discomfort and improve appearance.

How much does labiaplasty cost?

Costs vary widely, typically ranging from $3,000 to $8,000. Factors include surgeon’s experience, location, and facility fees.

Is labiaplasty covered by the NHS?

Generally, the NHS does not cover labiaplasty unless it’s medically necessary. Cosmetic reasons are usually not sufficient for coverage.

How do I choose the right surgeon for labiaplasty?

Select a board-certified plastic surgeon with extensive experience in labiaplasty. Check reviews and ask for before-and-after photos.

What type of anesthesia is used during labiaplasty?

Labiaplasty can be performed under local anesthesia with sedation or general anesthesia. Your surgeon will recommend the best option for you.

What should I expect during recovery from labiaplasty?

Expect swelling and discomfort for the first few days. Full recovery usually takes 4-6 weeks. Follow your surgeon’s post-op care instructions carefully.

Are there risks or side effects associated with labiaplasty?

Common risks include infection, scarring, and changes in sensation. Discuss potential complications with your surgeon beforehand to make an informed decision.

Stretch Marks on Thighs: Causes, Symptoms, and Treatment Options

Ever wondered why stretch marks on thighs seem so common? You’re not alone. Stretch marks can appear due to rapid weight changes, growth spurts, or even genetics. They often make people feel self-conscious, but there’s no need for that. Understanding what causes them and how to treat them can help you regain confidence.

We’ll cover why they happen, effective treatments, and preventive measures you can take. Whether you’re dealing with existing marks or looking to prevent new ones, we’ve got tips and insights to help you out.

Key Takeaways

  • Understand the Causes: Stretch marks on thighs are often caused by rapid weight changes, pregnancy, or puberty. Knowing the cause can help in choosing the right treatment.
  • Early Detection: Identifying symptoms early, such as red or purple lines, can make treatments more effective.
  • Effective Creams and Gels: Topical treatments with ingredients like retinoids or hyaluronic acid can improve the appearance of stretch marks.
  • Explore Nonsurgical Options: Treatments like laser therapy and microdermabrasion offer alternatives to surgery for reducing stretch marks.
  • Home Remedies: Natural options like aloe vera and coconut oil can provide some relief and improve skin health.
  • Prevention is Key: Regular moisturizing and maintaining a healthy weight can help prevent stretch marks from forming.

Understanding Stretch Marks

Definition

Stretch marks are scars. They form when the skin stretches or shrinks quickly. This rapid change causes the collagen and elastin to rupture. As the skin heals, stretch marks appear.

Appearance Over Time

Initially, stretch marks are pink or purple. These colors indicate fresh tears in the dermis. Over time, they fade to white or silver. This color change happens as blood vessels contract.

Formation on Thighs

Stretch marks on thighs often run perpendicular to the direction of skin stretching. For example, if your thighs expand horizontally, the stretch marks will form vertically. This pattern helps identify areas of rapid growth or weight gain.

Common Causes

Several factors can cause stretch marks:

  • Pregnancy: Rapid belly growth affects thigh skin.
  • Growth spurts: Teenagers may see these during puberty.
  • Weight changes: Quick weight gain or loss impacts skin elasticity.
  • Bodybuilding: Muscle growth can stretch thigh skin.

Risk Factors

Certain conditions increase the likelihood of developing stretch marks:

  • Genetics: Family history plays a role.
  • Corticosteroids: Prolonged use weakens skin structure.
  • Hormonal Changes: High levels of cortisol affect collagen production.

Prevention Tips

While you can’t completely prevent them, some measures help reduce their appearance:

  1. Moisturize regularly: Keeps skin supple and reduces tearing risk.
  2. Maintain a healthy diet: Supports overall skin health.
  3. Stay hydrated: Hydration improves skin elasticity.
  4. Exercise consistently: Helps manage weight and muscle growth gradually.

Causes and Risk Factors

Rapid Weight Changes

Rapid weight changes often cause stretch marks on thighs. When someone gains or loses weight quickly, the skin stretches or shrinks rapidly. This sudden change can tear the middle layer of skin. These tears show up as stretch marks.

Muscle Growth

Muscle growth can also lead to stretch marks. Bodybuilders or athletes who gain muscle mass fast may notice these lines. The skin stretches to accommodate the growing muscles, leading to stretch marks.

Hormonal Fluctuations

Hormonal fluctuations play a significant role in developing stretch marks. Teenagers during puberty experience these changes as their bodies grow quickly. Hormones like cortisol weaken the elastic fibers in the skin, making it easier for stretch marks to form.

Pregnancy Risks

Pregnancy is another common cause of thigh stretch marks. As the baby grows, a woman’s body expands rapidly. The skin must stretch significantly to accommodate this growth, leading to stretch marks. Increased hormonal levels during pregnancy can also make the skin more susceptible.

Genetic Predisposition

Genetics influence who gets stretch marks and who doesn’t. If your parents had them, you’re more likely to get them too. Researchers have found that certain genes affect how elastic your skin is.

Lifestyle Factors

Lifestyle factors like smoking elevate the likelihood of developing stretch marks. Smoking reduces blood flow to the skin, weakening its elasticity over time. Poor diet and lack of hydration also contribute by making the skin less supple.

Symptoms and Diagnosis

Initial Appearance

Stretch marks start as raised streaks. These streaks are often red, purple, or dark brown. They can feel itchy or slightly swollen at first. Over time, they fade to a lighter color. Eventually, they become scar-like lines.

Visual Diagnosis

Doctors usually diagnose stretch marks by looking at the skin. No medical tests are needed. The appearance of the marks is enough for diagnosis. This makes it easy to identify them early.

Emotional Impact

Stretch marks can affect self-esteem. Many people feel embarrassed by them. Body image issues can arise from these visible lines on the thighs. Some avoid wearing shorts or swimsuits.

Psychological Effects

The emotional toll can be significant. People may experience anxiety or depression due to their appearance. Living with stretch marks can be challenging for some.

Evidence and Procedure

There is evidence that certain treatments help reduce stretch marks’ visibility. Procedures like laser therapy or microdermabrasion are common options. These treatments aim to improve skin texture and color.

Side Effects

Treatments may have side effects such as redness or swelling. It’s important to discuss these with a doctor before starting any procedure.

Creams and Gels

Effective Ingredients

Topical treatments can help improve the appearance of stretch marks on thighs. Tretinoin is a common ingredient. It promotes new collagen production, which helps reduce the visibility of stretch marks. Another effective ingredient is hyaluronic acid. This substance hydrates the skin and improves skin tone.

e creams also contain peptides that boost collagen production. These ingredients work by stimulating the skin’s natural repair process. Lotions with hyaluronic acid help maintain moisture, making the skin more elastic.

Early Treatment

Applying creams and gels early can yield better results. Stretch marks are easier to treat when they are still red or purple. This stage indicates that the damage is recent, and the skin fibers have not fully healed.

Women often notice stretch marks during periods of weight gain or pregnancy. Starting treatment as soon as these marks appear can prevent them from becoming permanent scars. Using products consistently for several weeks is crucial for seeing improvement.

Safe Use During Pregnancy

Pregnancy causes many women to develop stretch marks due to rapid weight gain. However, caution is necessary when choosing products during this time. Some ingredients in creams and gels may not be safe for pregnant or breastfeeding women.

Consulting a doctor before using any product is essential. Avoid tretinoin during pregnancy because it can harm the unborn baby. Instead, opt for safer options like lotions containing hyaluronic acid or natural oils.

Long-Term Benefits

Using creams and gels regularly can offer long-term benefits for your skin’s health. These products help maintain elasticity by supporting the structure of elastic fibers in the skin. Over time, consistent use can improve overall skin texture and tone.

e users report reduced cellulite appearance along with improved stretch mark conditions. This dual benefit makes topical treatments attractive for those concerned about multiple skin issues.

Nonsurgical Options

Laser Therapy

Laser therapy is a popular nonsurgical option for stretch marks on thighs. It uses light to target and break down the scar tissue. This stimulates new skin growth. Dermatologists often recommend laser therapy for its effectiveness.

The procedure usually takes less than an hour per session. Most people need multiple sessions for the best results. Possible side effects include redness, swelling, and minor discomfort. Recovery time varies but generally lasts a few days.

Microneedling

Microneedling involves tiny needles that create micro-injuries in the skin. These injuries prompt the body to produce more collagen and elastin. This helps improve skin texture and reduce stretch marks.

This treatment has minimal downtime. Side effects may include mild redness and irritation, which typically subside within a day or two. Results can be seen after several sessions.

Microdermabrasion

Microdermabrasion exfoliates the outer layer of skin using tiny crystals or a diamond-tipped wand. It removes dead skin cells and promotes new cell growth, making stretch marks less noticeable.

Each session takes about 30 minutes to an hour. There is little to no recovery time needed. Some people experience slight redness or sensitivity afterward.

Consult a Dermatologist

It’s crucial to consult with a dermatologist before choosing any treatment options. A dermatologist will assess your skin type and the severity of your stretch marks. They can recommend the most suitable medical procedures based on these factors.

Different types of stretch marks may respond better to certain treatments than others. For example, newer, red stretch marks might react well to laser therapy, while older, white ones might benefit more from microneedling or microdermabrasion.

Home Remedies

Natural Oils

Olive oil and coconut oil can help moisturize the skin. They may improve elasticity, making stretch marks less visible. Olive oil contains vitamins A, D, and E, which nourish the skin. Coconut oil is rich in fatty acids that can hydrate deeply.

Butters

Cocoa butter is another option for moisturizing. It penetrates the skin to provide long-lasting hydration. Shea butter also works well. Both butters contain natural ingredients that can soothe irritation.

Massage

Massaging the affected areas with oils or butters can be beneficial. It increases blood flow and helps distribute nutrients to the skin. Use gentle circular motions to avoid causing any damage.

Centella Asiatica

Centella Asiatica, a herb commonly used in skincare products, might help reduce stretch marks. This plant can boost collagen production and improve skin strength. Some creams contain this ingredient specifically for treating stretch marks.

Balanced Diet

A balanced diet supports overall skin health. Vitamins and minerals are crucial for maintaining healthy skin. Foods rich in vitamins A, C, and E are beneficial:

  • Carrots
  • Citrus fruits
  • Nuts and seeds

Protein-rich foods like lean meats and legumes also support skin repair.

Limited Evidence

It’s important to note that there is limited scientific evidence supporting home remedies for completely removing stretch marks. These methods may reduce visibility but won’t eliminate them entirely.

Consult a Doctor

Always consult a doctor before trying new treatments at home. If irritation occurs, stop using the product immediately.

Prevention Tips

Healthy Weight

Maintaining a healthy weight is crucial. Rapid weight changes can cause the skin to stretch quickly. This often leads to stretch marks. Gradual muscle gain helps minimize this risk. It allows the skin to adapt slowly.

Avoid crash diets. These can lead to quick weight loss and subsequent rapid weight gain. Both scenarios stress the skin. Aim for a balanced diet and regular exercise instead.

Regular Moisturizing

Moisturizing routines are essential. Keeping the skin hydrated makes it more supple. Supple skin may resist stretch marks better.

Use products with ingredients like cocoa butter or shea butter. These are known for their moisturizing properties. Apply these lotions daily, especially after showers when the skin absorbs moisture well.

Hydration and Nutrition

Hydration plays a vital role in skin health. Drink plenty of water every day. Well-hydrated skin maintains elasticity better than dry skin.

Nutrition also impacts skin health significantly:

  • Vitamins A, C, and E are essential for healthy skin.
  • Zinc and silicon contribute to collagen production.
  • Protein-rich foods support overall tissue repair.

Include fruits, vegetables, nuts, and lean meats in your diet.

Exercise Routine

Regular exercise benefits overall health, including the skin. It improves blood circulation which nourishes the skin cells. Avoid excessive weightlifting that causes rapid muscle growth as it can lead to stretch marks.

Focus on balanced workouts combining cardio and strength training.

Avoiding Harsh Chemicals

Harsh chemicals in skincare products can damage the skin barrier. This might make it more prone to stretch marks.

Choose gentle, natural products whenever possible. Look for labels indicating hypoallergenic or dermatologist-tested formulas.

Summary and Updates

Research Findings

Recent studies have focused on understanding the causes of stretch marks. Researchers found that these marks often appear when the skin’s middle layer tears due to rapid growth or weight changes. This can happen during puberty, pregnancy, or significant weight gain.

Treatment Options

New treatments aim to reduce the appearance of stretch marks. Laser therapy is one popular method. It uses light to stimulate new skin growth and improve the texture of affected areas. Microneedling is another option. Tiny needles create small wounds in the skin, promoting collagen production.

Prevention Strategies

Preventing stretch marks involves maintaining healthy skin. Keeping the skin hydrated can help it stay elastic and resilient. Moisturizers containing hyaluronic acid or retinoids are beneficial. These ingredients boost collagen production and improve skin elasticity.

Advances in Technology

Superb technology has led to new methods for treating stretch marks. One such advancement is radiofrequency therapy. This technique uses heat to stimulate collagen production in deeper layers of the skin. Another innovation is platelet-rich plasma (PRP) therapy, which uses a person’s blood to promote healing and regeneration.

Holistic Approach

Adopting a holistic approach to skincare can help prevent and treat stretch marks effectively:

  • Maintain a balanced diet rich in vitamins and minerals.
  • Stay hydrated by drinking plenty of water.
  • Exercise regularly to keep your weight stable.
  • Avoid rapid weight gain or loss.

Consulting professionals like dermatologists can provide personalized advice tailored to your specific needs.

Final Remarks

Stretch marks on your thighs can be a nuisance, but understanding their causes and treatments helps you manage them better. From creams to home remedies, there are plenty of options to explore. Prevention tips offer proactive ways to keep your skin smooth and healthy.

Take action today. Try different methods and see what works best for you. Stay informed with the latest updates and don’t hesitate to consult a dermatologist for personalized advice. Your journey to smoother skin starts now.

Frequently Asked Questions

What are stretch marks?

Stretch marks are scars that appear when the skin stretches or shrinks quickly. They often show up as lines on the thighs, hips, and other areas.

What causes stretch marks on thighs?

Rapid weight gain, growth spurts, pregnancy, and hormonal changes can cause stretch marks on thighs. Genetics also play a role.

How are stretch marks diagnosed?

Doctors diagnose stretch marks through a physical exam. They look at your skin and review your medical history.

Do creams and gels work for stretch marks?

Creams and gels can help improve the appearance of stretch marks. Look for products with ingredients like hyaluronic acid or retinoids.

Are there nonsurgical options to treat stretch marks?

Yes, treatments like laser therapy, microneedling, and chemical peels can reduce the appearance of stretch marks without surgery.

Can home remedies help with stretch marks?

Home remedies such as aloe vera, coconut oil, and sugar scrubs may help moisturize the skin and improve its texture over time.

How can I prevent stretch marks on my thighs?

Maintain a healthy weight, stay hydrated, eat a balanced diet, and use moisturizing lotions to keep your skin elastic.

Facial Implants | Chin, Cheek & Jaw Procedures

Facial implants can transform not just looks but also self-confidence. Unlike temporary fixes, these implants offer a lasting solution to enhance facial features. Whether it’s chin augmentation or cheek enhancement, facial implants provide structural improvements that makeup or fillers can’t achieve.

People often struggle with dissatisfaction over their facial contours. Facial implants address this by offering a permanent change that blends seamlessly with natural bone structure. This blog post will guide you through the benefits, types, and considerations of opting for facial implants.

Key Takeaways

  • Understanding Facial Implants: Facial implants are medical devices designed to enhance or reconstruct facial features, offering a solution for those looking to improve their appearance or correct deformities.
  • Enhancement Options: Implants can enhance various facial features, including the chin, cheeks, and jaw, providing a more balanced and aesthetically pleasing look.
  • Chin Implants Specifics: Chin implants are popular for defining the jawline and improving facial symmetry. The procedure involves inserting a silicone implant through a small incision.
  • Cheek Implants Process: Cheek implants add volume and contour to the mid-face area. This step-by-step procedure typically involves inserting the implants through incisions made inside the mouth or lower eyelid.
  • Jaw Implants Functionality: Jaw implants create a stronger and more defined jawline. They are inserted through incisions inside the mouth to minimize visible scarring.
  • Candidate Criteria and Safety: Ideal candidates are healthy individuals with specific aesthetic goals. Understanding the procedure, recovery, risks, and safety measures is crucial for making an informed decision.

Explaining Facial Implants

Purpose and Benefits

Facial implants enhance facial structure. They add volume and definition to the face. People use them to improve symmetry. Facial implants can boost confidence. They help in achieving a balanced look.

Types of Materials

Facial implants are made from various materials. Silicone is common. It is durable and flexible. Polyethylene is another option. It integrates well with tissues. Both materials are safe for the body.

Cheek Implants

Cheek implants provide fuller cheeks. They add contour to the mid-face area. This improves facial harmony. Fuller cheeks can make a face look more youthful.

Chin Implants

Chin implants enhance the chin’s shape and size. A well-defined chin balances facial features. This implant helps in achieving a stronger jawline.

Jaw Implants

Jaw implants define the lower face better. They add width to the jawline. This creates a more robust appearance. A strong jawline is often seen as attractive.

Enhancing Features with Implants

Balance and Proportion

Facial implants can bring balance to the face. They add volume to areas that lack definition. This helps in achieving a harmonious look. For example, cheek implants enhance the malar area. They provide a fuller appearance.

Implants also correct facial asymmetry. If one side of the face is different from the other, an implant can help. This improves overall facial structure. Proportional features are often seen as more attractive.

Selecting the Right Implant

Choosing the right implant is crucial. The surgeon will evaluate your facial structure first. They consider factors like skin thickness and bone density.

Different types of implants exist for various needs:

  • Cheek implants for fuller cheeks.
  • Chin implants to define the jawline.
  • Jaw implants to strengthen weak jaws.

The doctor will discuss these options with you. They aim to match your goals with the best type of implant.

The Surgical Process

Implant surgery involves several steps. First, an incision is made inside the mouth or under the chin. This reduces visible scarring. The surgeon then creates a pocket for the implant.

Suturing ensures that the implant stays in place. Proper implant fixation is vital to avoid displacement later on. Any hardware used must be compatible with your body.

After placement, sutures close the incision site. Post-surgery care includes monitoring for complications like edema or hematoma.

Boosting Self-Confidence

Facial implants can greatly boost self-confidence. Many people feel dissatisfied with their appearance due to certain features. Implants offer a permanent solution for this issue.

Improved facial symmetry and proportion lead to higher satisfaction levels. People often report feeling more confident in social situations after surgery.

Detailed Look at Chin Implants

Procedure Overview

Chin implants involve a surgical procedure. Surgeons make an incision either inside the mouth or under the chin. They create a pocket in front of the chin bone. The implant is then placed into this pocket.

The surgery usually takes about one hour. Patients receive local anesthesia with sedation or general anesthesia. After placing the implant, surgeons close the incision with sutures.

Enhancing Facial Harmony

Chin implants can enhance facial harmony. A well-proportioned chin balances other facial features. This balance can improve overall appearance.

A small or recessed chin often makes other features appear larger. By enhancing the chin area, facial symmetry improves significantly. This change can boost self-confidence and satisfaction with one’s look.

Correcting Recessed Chins

A recessed chin affects facial profile negatively. It makes the lower face look weak or undefined. Chin implants can correct this issue effectively.

Implants add projection to the mandibular angle and forward part of the chin. This results in a stronger, more pronounced profile. Many patients find their side view greatly improved after surgery.

Customization Options

Chin implants come in various sizes and shapes. Surgeons choose an implant that fits individual needs best. Customization ensures that each patient gets optimal results.

e common shapes include square, tapered, and round implants. Size varies depending on how much enhancement is needed for balance.

Surgeons also consider skin thickness and bone structure when selecting an implant type and size. These factors help achieve a natural look post-surgery.

Recovery Process

Recovery from chin implant surgery is generally quick. Most patients return to normal activities within a week.

Swelling and bruising are common but subside in a few days. Pain is manageable with prescribed medication.

Patients should avoid strenuous activities for several weeks to ensure proper healing of the chin area.

Cheek Implants Step by Step

Consultation

The first step is the consultation. During this visit, the surgeon examines your facial structure. They discuss your goals and expectations. The surgeon evaluates your cheekbones to determine the best implant size and shape.

Pre-Surgery Preparation

Before surgery, you need to follow specific instructions. These may include stopping certain medications. You might also need to avoid eating or drinking for a few hours before surgery.

Surgery Day

On the day of surgery, you receive anesthesia. This could be local or general, depending on the procedure’s complexity. The surgeon makes small incisions inside your mouth or lower eyelids. This helps minimize visible scarring.

Implant Placement

Next, the surgeon creates pockets in the tissue overlying your cheekbones. They then insert the implants into these pockets. The implants are usually made of silicone or other biocompatible materials.

Closing Incisions

After placing the implants, the surgeon closes the incisions with sutures. These sutures dissolve over time and do not require removal.

Immediate Post-Surgery Care

You will spend some time in a recovery area after surgery. Medical staff monitor you as you wake up from anesthesia. You might experience swelling and discomfort around your cheeks.

Adding Volume

Cheek implants add volume to recessed areas of your face. This can create a more youthful appearance by enhancing facial contours. Many patients report increased confidence after their procedures.

Recovery at Home

Once home, follow post-operative care instructions closely:

  • Keep your head elevated
  • Avoid strenuous activities
  • Take prescribed pain medications
  • Use ice packs to reduce swelling

Healing Process

The initial healing phase lasts about one week. Swelling and bruising gradually subside during this period. Most people return to work within 7-10 days.

Long-Term Results

Final results become apparent after several months when all swelling resolves fully. The implants integrate with your natural tissue, providing lasting enhancement.

How Jaw Implants Work

Goal of Jaw Implants

Jaw implants aim to enhance the lower third of the face. They create a stronger jawline by widening this area. This often results in a more balanced and defined appearance. Many people seek jaw implants to improve their facial symmetry.

A strong jawline is seen as attractive. It gives the face a more youthful look. People with weak or receding chins benefit greatly from these implants.

Surgical Technique

Surgeons use precise techniques to place jaw implants. The surgery starts with an incision inside the mouth or under the chin. This keeps visible scars to a minimum.

Next, they create a pocket for the implant in the jawbone. The implant is then inserted into this pocket. Surgeons tailor each implant to fit the patient’s unique anatomy.

The customization ensures a natural look. It also helps avoid complications like shifting or discomfort.

Tailoring to Each Patient

Each patient has different needs for their jawline enhancement. Surgeons consider factors like bone structure and skin type when choosing an implant.

They may use imaging technology to plan the surgery. This allows them to see how the implant will look before performing the procedure.

Patients often discuss their goals with their surgeon beforehand. This helps ensure that expectations are met and results are satisfactory.

Impact on Facial Symmetry

Jaw implants significantly impact facial symmetry. A well-defined jawline balances other facial features like cheeks and nose.

Improved symmetry can boost self-esteem and confidence. People notice changes not just in appearance but in how they feel about themselves too.

Symmetry is crucial for aesthetics. A balanced face is often perceived as more attractive and harmonious.

Aesthetic Benefits

Besides improving symmetry, jaw implants offer other aesthetic benefits:

  • Enhanced definition: They make the jawline sharper.
  • Youthful appearance: They help reduce signs of aging.
  • Balanced proportions: They harmonize with other facial features.

These benefits make jaw implants popular among those seeking cosmetic enhancements.

Candidate Criteria for Implants

Ideal Characteristics

Candidates for facial implants should be in good health. They must not have any serious medical conditions. Chronic illnesses can complicate surgery and recovery. Good candidates also have specific aesthetic goals. They seek to enhance their facial structure.

Health Status

Potential patients need a stable health condition. Conditions like diabetes or heart disease may pose risks. Smoking can also affect healing. Surgeons often advise quitting smoking before surgery.

Aesthetic Goals

Clear and realistic aesthetic goals are crucial. Candidates should want to improve specific facial features. These could include the jawline, cheeks, or chin. Having a clear vision helps achieve satisfying results.

Realistic Expectations

Understanding potential outcomes is vital. Surgery can enhance appearance but has limits. Unrealistic expectations lead to disappointment. Patients must grasp what implants can realistically achieve.

Potential Outcomes

Facial implants provide permanent changes. They can improve symmetry and balance of the face. However, they cannot solve all cosmetic concerns. Knowing this helps set achievable goals.

Consultation Importance

A consultation with a plastic surgeon determines suitability for implants. The surgeon evaluates health history and aesthetic desires during this meeting.

Surgeon Evaluation

The surgeon examines facial structure and skin quality. They discuss the patient’s medical history thoroughly. This includes past surgeries and current medications.

Personalized Plan

Based on the evaluation, the surgeon creates a personalized plan. This plan outlines the type of implant needed and expected results.

Procedure and Recovery Insights

Surgery Steps

Facial implant surgery involves several key steps. First, patients receive general anesthesia to ensure comfort. Surgeons then make incisions at strategic sites. These are usually inside the mouth or along natural skin creases to minimize visible scarring.

Surgeons create a pocket for the implant. This pocket is made either above or below the facial muscles, depending on the desired outcome. The implant is then carefully inserted into this pocket. Once in place, surgeons close the incisions with sutures.

Techniques Used

Different techniques are used based on the type of implant and patient needs. For chin implants, surgeons often use an incision under the chin or inside the mouth. Cheek implants typically require incisions inside the upper lip or lower eyelid.

Using advanced imaging techniques helps in precise placement. This reduces risks and improves outcomes. Surgeons may also use custom-made implants for better fit and symmetry.

Typical Recovery Timeline

Recovery from facial implant surgery varies by individual but follows a general timeline:

  • First Week: Patients experience swelling and bruising.
  • Second Week: Swelling starts to subside; stitches are removed if not dissolvable.
  • First Month: Most swelling disappears; normal activities can resume.
  • Three to Six Months: Final results become apparent as healing completes.

Patients should follow their surgeon’s guidelines closely during recovery.

Pain Management

Pain is common after surgery but manageable with medication. Surgeons prescribe pain relievers to ease discomfort. Some patients report paresthesia, a tingling sensation, which usually resolves within weeks.

Keeping the head elevated helps reduce swelling and pain. Cold compresses can also be applied to minimize discomfort during the first few days post-surgery.

Activity Restrictions

Patients need to limit physical activity during recovery. Avoid strenuous exercises for at least four weeks. Gentle walking is encouraged to promote circulation without straining surgical sites.

Avoid bending over or heavy lifting as these actions increase blood pressure in the face, leading to more swelling and potential complications.

Follow-up Care

Regular follow-up appointments are crucial for monitoring progress. Surgeons check for signs of infection or other complications like shifting implants or abnormal scarring.

Patients receive specific instructions on caring for incision sites, including cleaning protocols and when they can resume certain activities like washing their face normally.

Risks and Safety Measures

Common Risks

Facial implant surgery carries several risks. Infection is a primary concern. It can occur if bacteria enter the surgical site. Implant displacement is another risk. The implant may shift from its original position, causing asymmetry.

Other risks include:

  • Bleeding
  • Scarring
  • Nerve damage

These complications are rare but possible.

Infection Control

Surgeons take steps to reduce infection risk. They use sterile techniques during surgery. Antibiotics may be given before and after the procedure. Proper wound care post-surgery is also crucial.

Patients should follow all aftercare instructions. This helps prevent infections and promotes healing.

Implant Materials

The choice of implant material affects safety. Surgeons prefer biocompatible materials. These materials reduce the risk of rejection and complications.

Common materials include:

  • Silicone
  • Gore-Tex
  • Medpor

Each has specific benefits and risks.

Surgical Techniques

Advanced surgical techniques improve safety. Surgeons use precise methods to place implants correctly. This reduces the risk of displacement and other issues.

Minimally invasive techniques are often used. These methods involve smaller incisions, which lead to faster recovery times and fewer complications.

Surgeon Expertise

Choosing a qualified surgeon is crucial for safety. An experienced plastic surgeon ensures optimal results and minimizes risks.

Look for board certification in plastic surgery. Check the surgeon’s experience with facial implants specifically.

Expected Outcomes

Long-term Benefits

Facial implants offer several long-term benefits. They enhance facial contours and improve symmetry. This can lead to a more balanced appearance. Studies show that many people experience increased self-esteem after getting implants.

Enhanced facial contours make the face look younger. Improved symmetry helps in achieving a more aesthetically pleasing look. These changes can be permanent, providing lasting satisfaction.

Increased Self-Esteem

Many people feel better about their appearance post-surgery. Increased self-esteem is one of the most common outcomes noted in various articles. When individuals are happier with how they look, they often feel more confident.

Self-esteem boosts can affect other areas of life too. People might feel more comfortable in social situations. They may also find themselves more willing to participate in activities they previously avoided.

Stability Over Time

The stability of implant results is generally high. Over time, the shape and volume of the implants remain consistent. This means that once healed, the results are long-lasting.

However, there could be some cases where adjustments are needed. Displacement is a common complication but usually happens within the first few days post-surgery. If it occurs later, it might require minor revisions.

Potential for Adjustments

Future adjustments or revisions are possible but not always necessary. Most people do not need further surgeries after their initial procedure. Yet, if dissatisfaction arises due to shifting or other issues, corrections can be made.

e may opt for additional procedures to enhance their results further. The total number of follow-up surgeries remains low according to literature reviews.

Closing Thoughts

Facial implants can transform your look and boost your confidence. Whether you’re considering chin, cheek, or jaw implants, understanding the process and risks is crucial. With the right information, you can make an informed decision about enhancing your features.

Ready to explore facial implants further? Consult with a qualified surgeon to discuss your goals and expectations. Your journey to a refreshed appearance starts now. Take the first step towards the new you today!

Frequently Asked Questions

What are facial implants?

Facial implants are medical devices designed to enhance or reconstruct facial features. They provide structure and balance to the face.

How do chin implants improve appearance?

Chin implants enhance jawline definition, creating a balanced profile. They can correct a weak chin and improve overall facial harmony.

Who is a good candidate for facial implants?

Ideal candidates are healthy individuals with realistic expectations. They should have fully developed bone structure and no contraindications for surgery.

What is the recovery time for cheek implants?

Recovery from cheek implant surgery typically takes about two weeks. Swelling and bruising may persist but gradually subside.

Are there risks associated with jaw implants?

Yes, risks include infection, implant shifting, and nerve damage. Choosing an experienced surgeon minimizes these risks.

How long do facial implants last?

Facial implants are generally permanent. However, they can be removed or replaced if necessary due to complications or personal preference.

What outcomes can I expect from facial implant surgery?

You can expect enhanced facial contours and improved symmetry. Results vary but often lead to increased confidence and satisfaction with appearance.